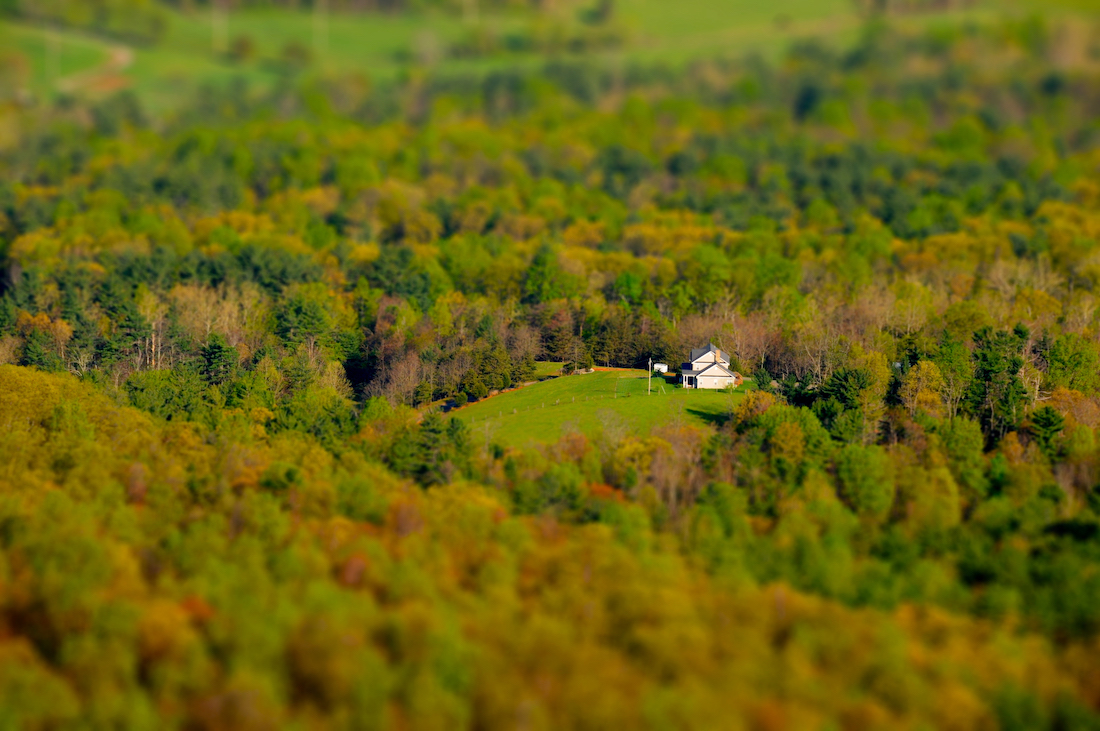
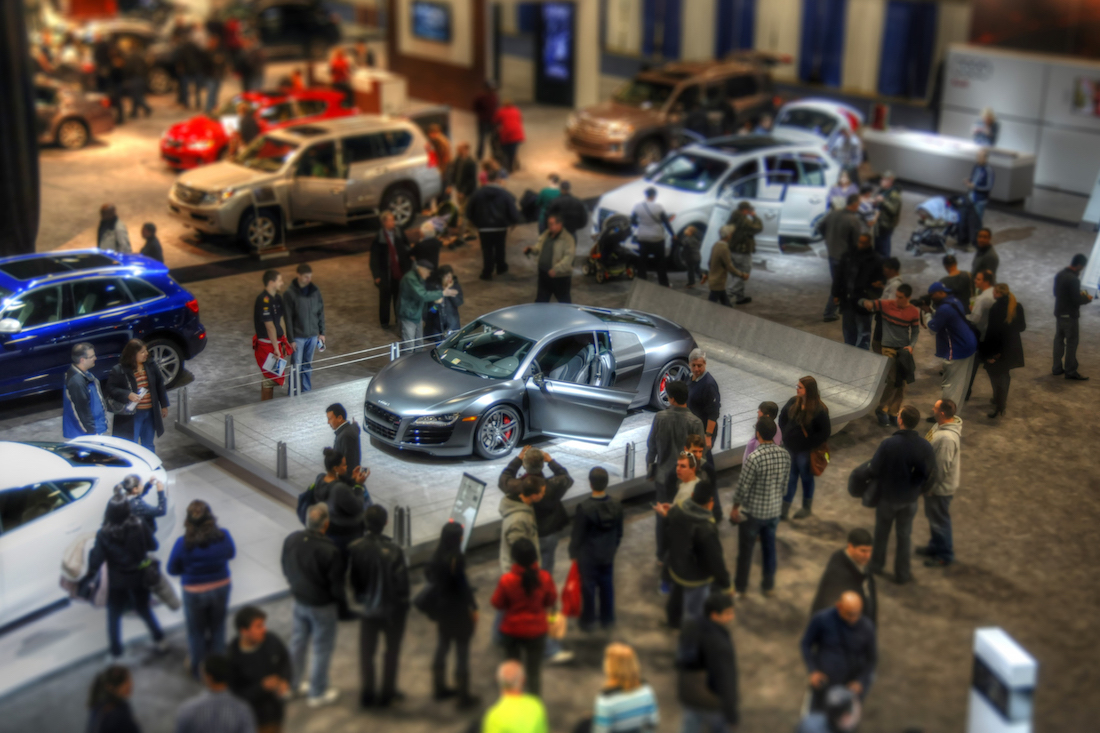
 The tilt-shift effect creates the illusion of a miniature scene through the blurring of the foreground and background of an image, leaving a narrow band of sharp focus. I’ve found this effect can add visual interest to photos. Much like Instagram filters, it cannot turn a bad picture into a good one, but it can add pizzazz to a photo that seems to be missing something.
This is called the “tilt-shift” effect because it can be accomplished in-camera using a tilt-shift lens. These lenses are expensive and have a range of other drawbacks (e.g., they often require manual focus), so I was excited to learn that the effect could be “faked” in post-processing. I will walk through my usual workflow for taking and processing tilt-shift photos below.
My Nikon D750 has an in-camera software filter that will apply this tilt-shift effect. I’ve used it once or twice, but it is not at all customizable, the transition from sharp to blurry is harsh, and I prefer to apply it after the fact since, if it’s done in camera, you can’t undo it.
Let’s get started…
Workflow
Note: This is all done in Photoshop CS4. CS4 was already outdated when I originally wrote this post in 2012, but it is still what I use. Eventually I will upgrade to CC and update this post.
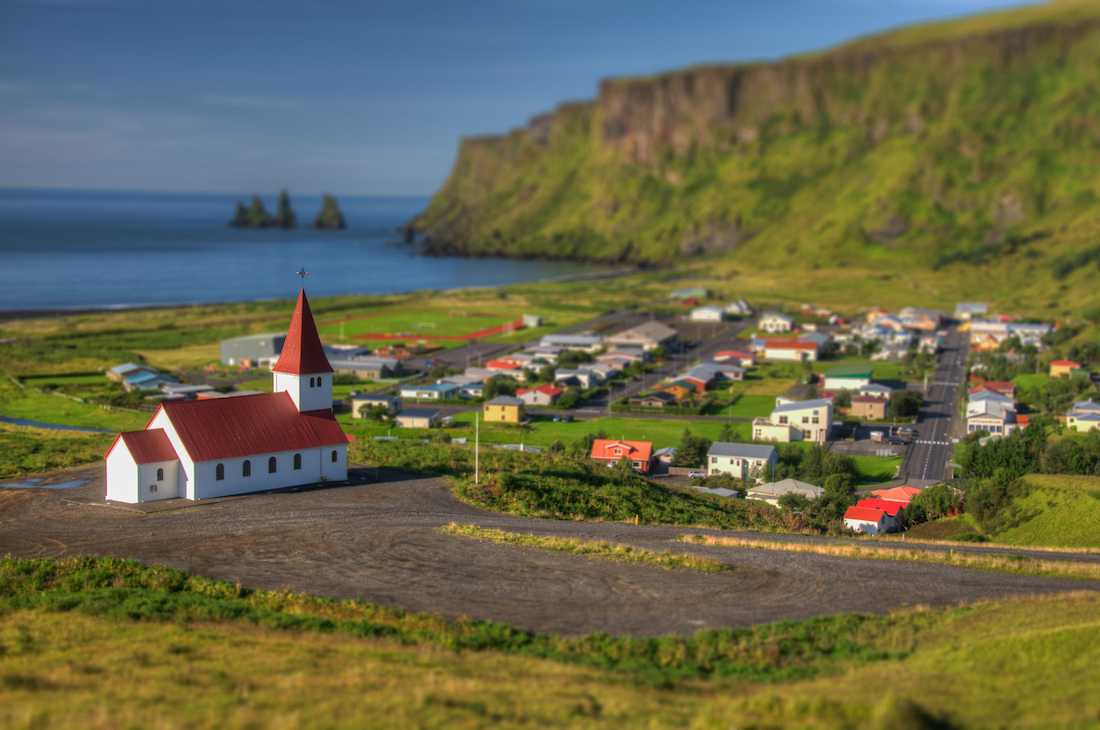
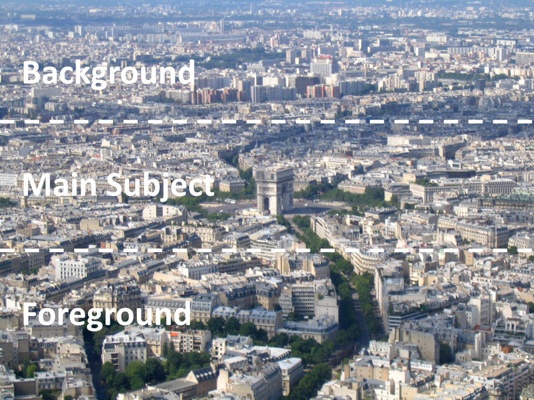
- Select the Scene and Take the Photo – The most important, and often the most difficult, step in creating a good tilt-shift photo is selecting an appropriate scene to add the effect to. For the most dramatic scene, you want to take your photo from an elevated position, slightly above the main subject of your photo. You should be looking down on the scene at a 30 – 60 degree angle. You don’t want to look at so steep an angle that you’re almost looking straight down, but you also don’t want to be at such a shallow angle you can’t differentiate the subject of the photo from the background. You should be able to mentally segment the photo into foreground, main subject, and background using straight horizontal lines.
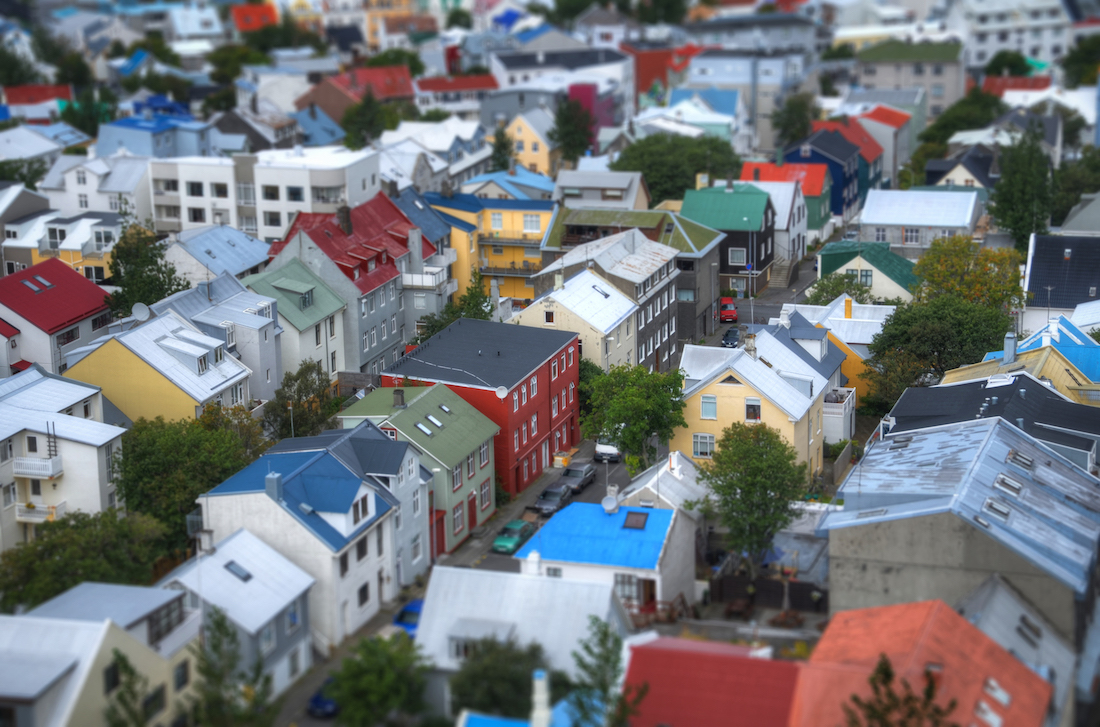
As you use this effect more, you will start to develop your own style and taste for what makes a good “main subject” of the photo. One of the cool things for me about creating these types of photos is the toy-like appearance of elements in scene, so I prefer objects that remind me of toys I played with as a child such as construction machinery, trains, etc.
- Add the Tilt-Shift Effect in Photoshop – Once you’ve taken the photo, you can apply the effect. There are programs such as Adobe Lightroom 4 that offer the tilt-shift effect as a filter that you can easily select and make adjustments to. The process is slightly more complicated but also more flexible using Photoshop. I have Photoshop CS4. The process described below may be different in other versions.

- Open a Copy of the Image or Click Save As… – You’re going to make significant changes to the photo, so be sure you’re not working with your only copy.
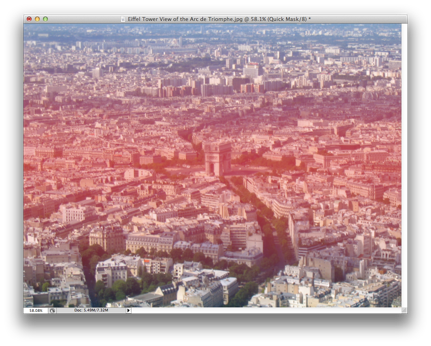
- Create Selection Mask – The first thing you want to do is use a selection mask to select the area you want to appear blurry.
- Click on the Quick Mask Mode Icon

- Click on the Gradient Tool Icon

- Click on the Reflected Gradient Icon

- Select the Foreground to Transparent Option

- Select the area you want to appear in focus – Click on the center of the main subject of your photo and drag the cursor directly upward or downward (it doesn’t matter which direction, but make sure you straighten out the drag line before releasing the mouse). When you release the mouse you will see an area shaded in red. Notice that this starts out solid and gradually becomes more transparent as it proceeds toward the edge of the photo. This shows the areas that will be in focus or some degree of focus.
- Click on the Quick Mask Icon Again to return to Standard Mode
- Click on the Quick Mask Mode Icon
- OPTIONAL – Deselect (Unmask) Important Elements in the Photo – One advantage to adding the tilt-shift effect in post-processing is the ability to customize the way the blurred areas of the photo look. If there is an important element of the photo that falls into the selected area (i.e., it will be blurry), I use tools to deselect that area.
-
- Click on the Polygon Lasso Tool Icon
 – You can use whatever selection tool you feel most comfortable with.
 - Click on the Subtract From Selection Icon

- Click around the area you want to deselect – Take special care to stay close to edges and make the selection area as smooth as possible. Also, make sure you’re selection area crosses through the sharpest area (the center) of focus in the picture. This will save you from having any abrupt transitions from focused to blurry.
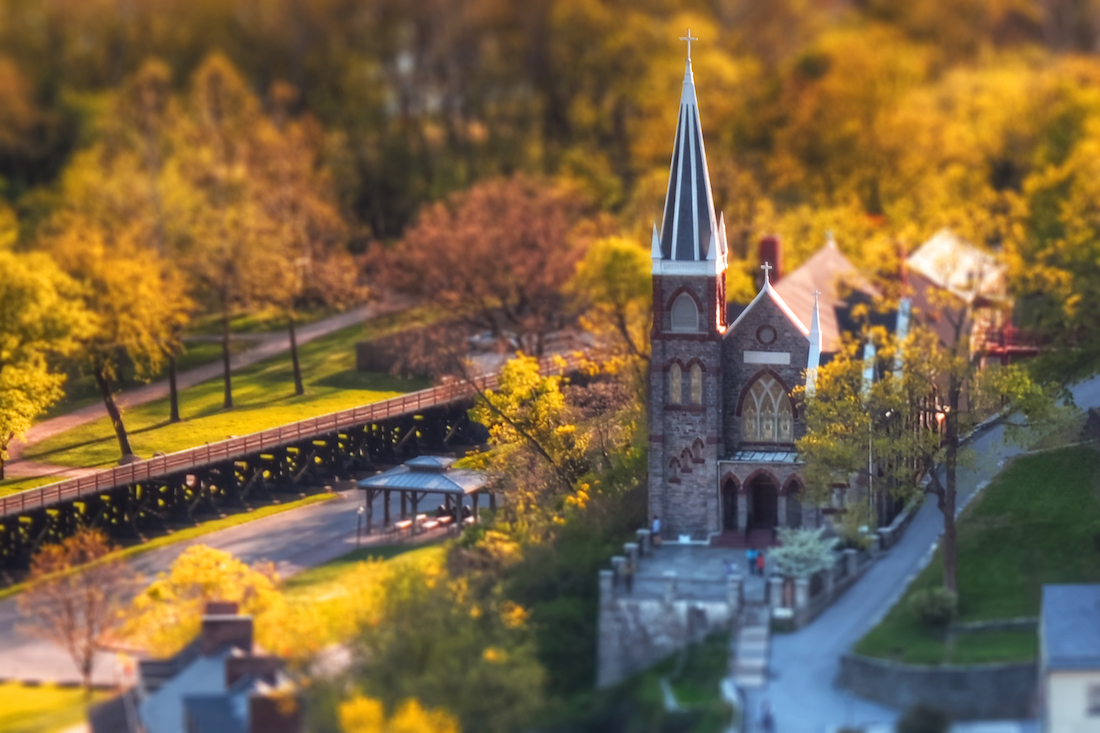
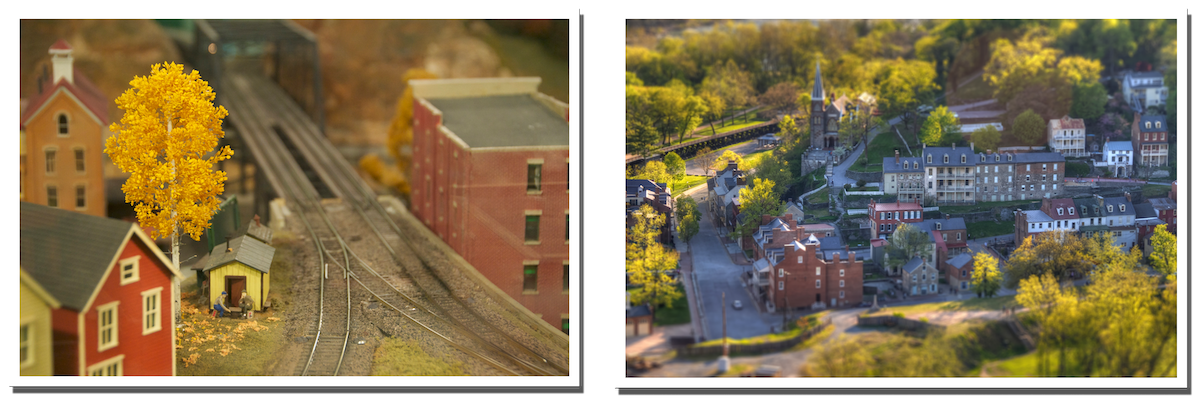
Harper’s Ferry, WV
- Click on the Polygon Lasso Tool Icon
-
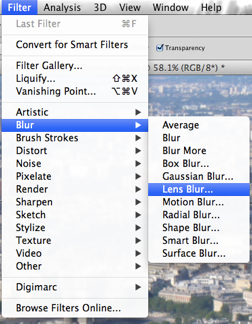
- Apply Lens Blur Filter
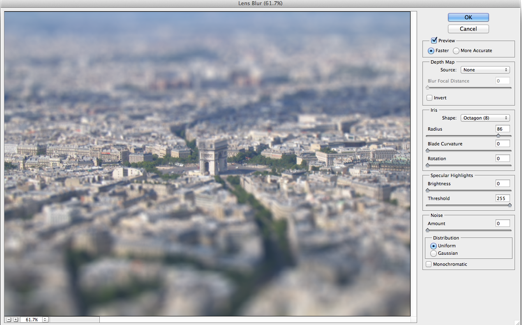
- Click on Filter > Blur > Lens Blur – A dialogue box will appear
- Adjust Settings – The radius slider will control how strong the blur effect is
- Add Saturation – Toys are often more colorful than their real-life counterparts. To reinforce that illusion that these are toys, punch up the color.
- Click Select > Deselect to remove selection
- Add a Saturation Adjustment Layer

- Adjust Settings

- Flatten the Image – Once you’ve made your adjustments and the photo looks just right, flatten your image
- Click Layer > Flatten Image
The Final Product
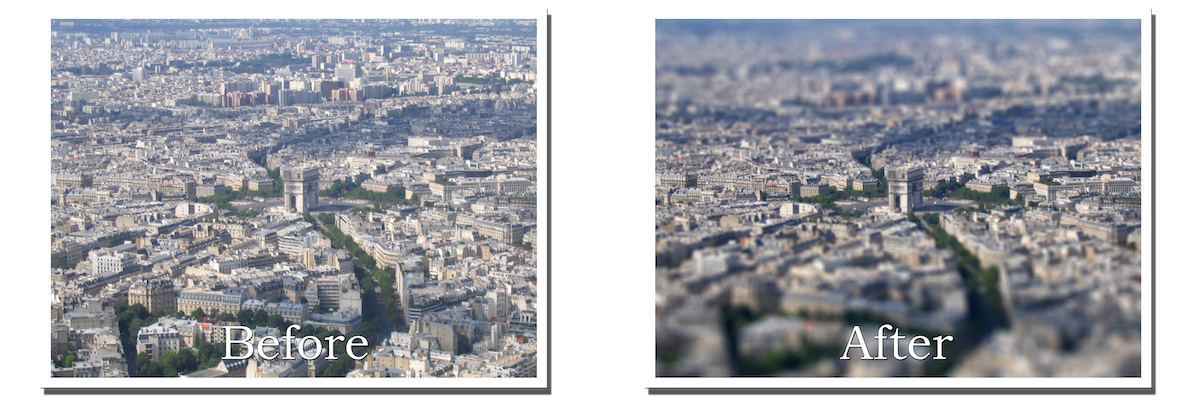
Examples