[youtube=http://youtu.be/3kS_fZG3MjQ]
I remember watching a Simpsons episode where Lisa wins an essay contest and the family heads to Washington, DC. Needing a moment to get away and reflect on things, she heads to the National Mall and finds the Lincoln Memorial is too crowded and so heads to the Jefferson Memorial. Over my short time in DC, I’ve found myself in that same position several times. The Lincoln is my favorite of the Memorials but it is bustling with people almost all day, year round. The Jefferson, on the other hand, has all of the grandiosity of the Lincoln Memorial with far fewer people.
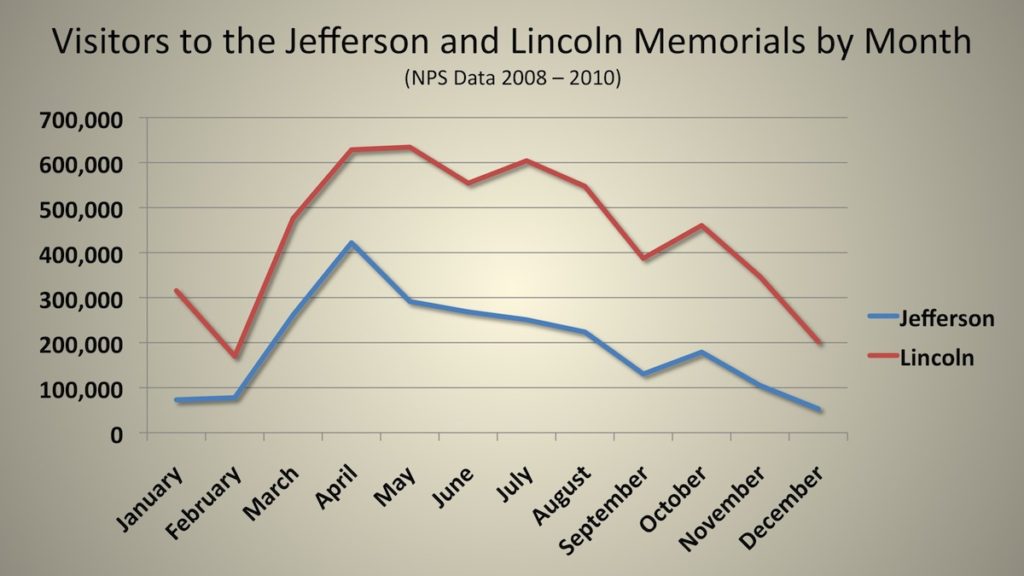
When To Go
The Jefferson Memorial sits on the Southeast side of the Tidal Basin and the Tidal Basin is ground zero during Cherry Blossom season (late March – mid-April). Hundreds of thousands of people pack the narrow pathways that surround the Basin and many take this opportunity to check out the Jefferson. The rest of the year, things are a lot less hectic and most visitors come by either bus or bike. Those that don’t want to make the 0.8 mile walk from the Washington Monument or the 0.7 mile walk from the Martin Luther King Memorial are content with viewing it from across the water. This makes the Jefferson Memorial a great place to take photos 11 months out of the year.
My favorite time to photograph the Jefferson Memorial is at evening twilight; just after sunset. The sky still holds some of its color but it’s dark enough to see the lighting on the Memorial. The Jefferson has great exterior lighting, which makes it a great place to go after dark. The front of the Memorial faces North which causes some issues with shadows during the winter months when when the sun rises and sets further South. This can be dealt with using HDR or some trial and error with adjusting your exposure settings.
Photographic Possibilities
-Finding The Angles-
As I see it, there are four types of photos you can take at the Jefferson. The first are photos inside the Memorial. I don’t find these particularly interesting. It is a tight space, it’s not very well lit, and for some reason the National Park Service (NPS) leaves the cherry picker they use to change the lights parked off to the side of the rotunda so it’s liable to get into some of you photos. If you want photos of the interior, bring a wide-angle lens and go around sunrise or sunset when the sun is low enough to light the interior. Also, be aware that tripods are not allowed on the steps or inside the Memorial so dealing with low light situations can be tricky.
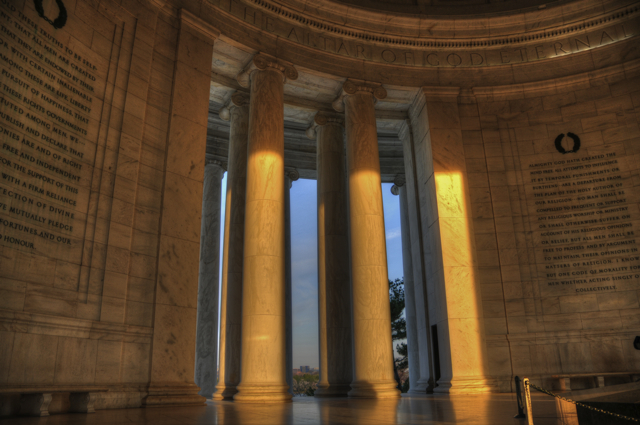
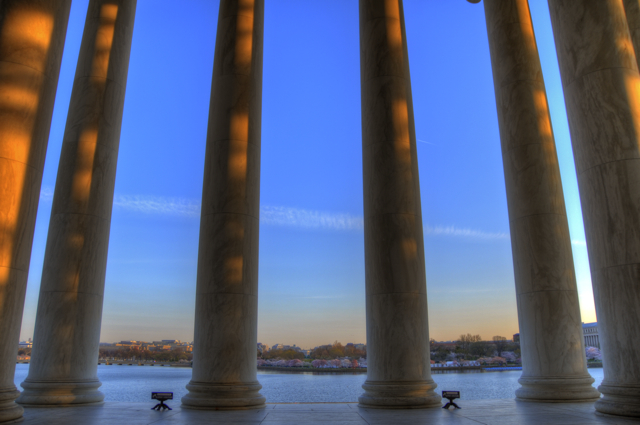
I enjoy photos that look out from the Memorial. The Jefferson Memorial has one of the best views in Washington, DC. The Washington Monument and the White House are both visible from inside the Memorial and using the Memorial’s columns to frame these sights is a great way to give the viewer the illusion that they are the statue of Thomas Jefferson.
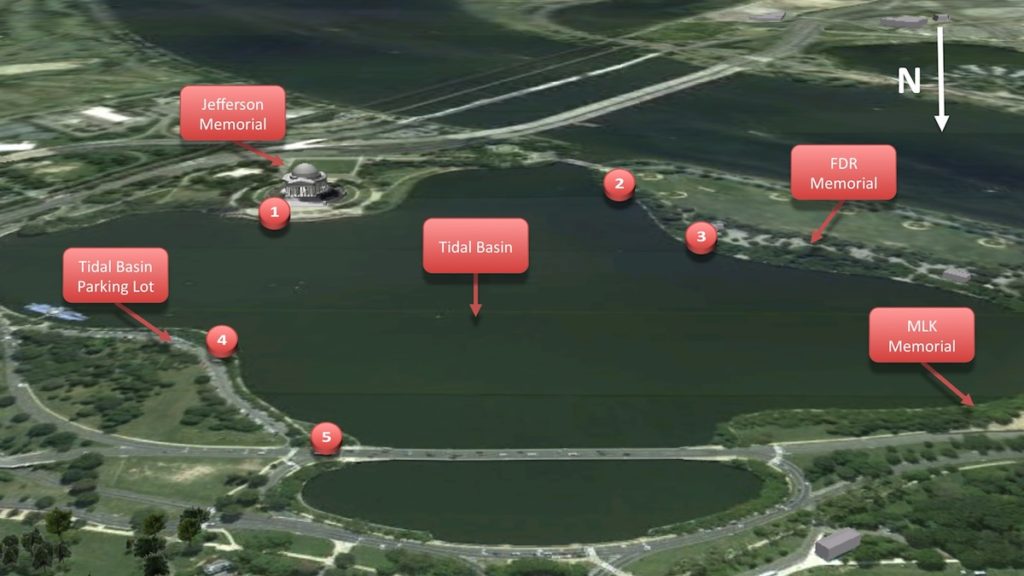
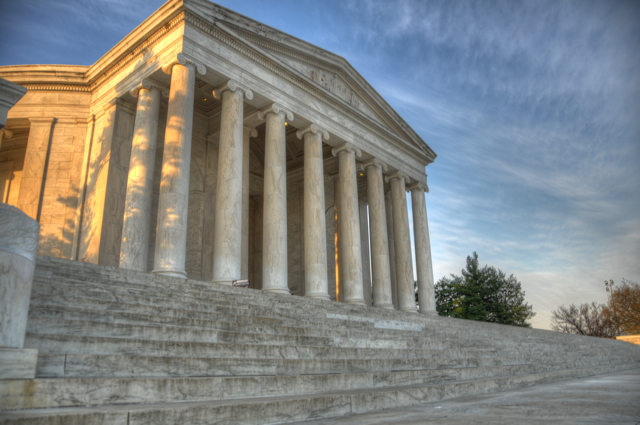
Photos from the area immediately surrounding the Memorial (1) can make it look larger than life. Using a wide-angle lens and a low angle to capture the stairs leading up to the Memorial makes you feel like you’re in Rome. Because of construction on the sea wall in front of the Memorial, it used to be hard to back far enough away fit it all into a photo. Now that the construction is complete you can capture it in its entirety with a focal length of 18-25mm.
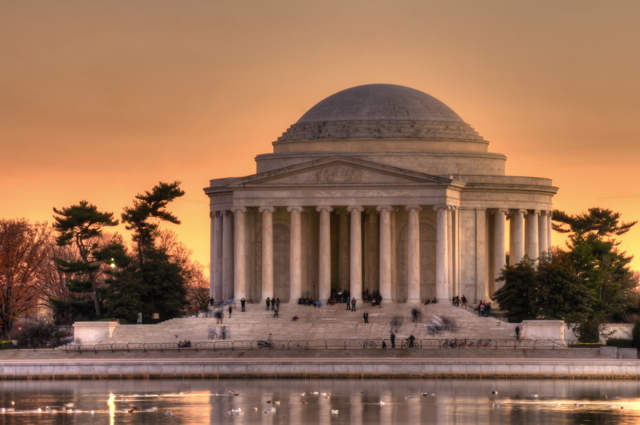
Photos from across the Tidal Basin are my favorite. I love reflections and there are a number of angles to choose from that incorporate the water. The best places I’ve found are near the parking lot on the Northeast side of the Basin (4) and next to the FDR Memorial on the West side (3). The parking lot offers a central view of the Memorial where you can see the statue or a slightly off-axis view like the one below (5). At the FDR Memorial you get more of a profile (see the photo below under reflections).
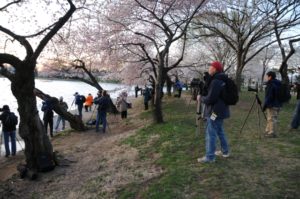
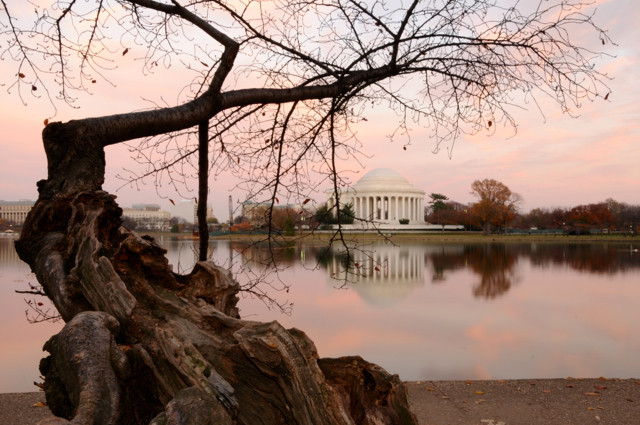
One other angle that I think is worth mentioning is near the FDR Memorial where an old cherry tree leans so much it nearly blocks the path that surrounds the Tidal Basin (2). If there is a lot of traffic it can cause some awkward moments as people try to figure out how to get passed one another. I love including this tree as a foreground element. It has a lot of character. It is nice to see in full bloom during Cherry Blossom picture but the picture of the photographers above was taken at this spot so you can imagine how difficult it is to get a photo without people during this time.
-Smoothing Out Reflections-
The Basin is a large body of water and thus susceptible to waves in even the lightest of breezes. This can make a mirror-like reflection almost impossible. One way to lessen the effect of the waves is to take a longer exposure by narrowing your aperture and/or using a neutral density filter.

-Consider HDR-
The Jefferson Memorial is made of white marble infused with fine grey and off-white details that often don’t come out in single-exposure images. The same is true for buildings like the Capitol and the Lincoln Memorial. In many images, they appear uniformly white and this might “feel” right and fit the memories you have. It isn’t until you see two images side-by-side that you see the difference in texture that HDR can bring out.

-Prioritize Photos of the Exterior-
As I write these articles, I get into the habit of saying “You should try to photograph X at sunrise or sunset.” The unfortunate fact is that you can’t be everywhere at once. While it would be ideal to get photos of the interior of the Jefferson Memorial at sunrise, you may also want to get photos from near the FDR Memorial which is a 5-10 minute walk away. The chances of getting the perfect light for both are slim. So let me suggest this; for the Jefferson Memorial, make sure you get photos of the exterior while the lighting is right and then move inside where perfect lighting is less important. If you’re going for sunrise, get your twilight and sunrise photos from the FDR Memorial (2) or (3) or Tidal Basin Parking Lot (4) or (5) first and then get closer. If you’re going for sunset do the opposite; take pictures of the interior first and then move further away.
What To Bring
Lens: The Jefferson Memorial offers a wide variety of photos. On those trips when I have my small photo bag, that only carries my camera and its attached lens, I’ve found myself frustrated. If you’re up close to, or inside of, the Memorial you’ll want a lens with a very wide angle of view (<18mm for DX cameras; <27mm for FX). Without the wide-angle you’ll be cutting out important parts of the photo and there’s only so far back you can go before you fall in the water. When you’re taking photos from across the Tidal Basin you’ll want the ability to zoom in and cut out distracting elements. This requires anywhere from 50-150mm (DX; 75-225mm FX) of zoom range depending on where you set up.
Tripod: You should bring a tripod. While tripods aren’t allowed inside the Memorial or on the steps they are allowed pretty much everywhere else including the area immediately in front of the Memorial. You’ll find a tripod tremendously helpful when taking photos at a longer focal length, in low light situations, or when you’re using a neutral density filter to flatten out the waves. I’ve also used a Gorillapod on the steps without getting hassled, though I don’t know if that’s just because I wasn’t noticed.
Flash: Leave the flash behind. You may want a flash for photos inside the Memorial but it won’t do you much good outside since the structure is so big.
Filters: As I recommended earlier a neutral density filter can be very helpful for smoothing out the waves in the Tidal Basin. It can also be helpful for blurring the motion of people coming to and from the Memorial. I’ve also used a split neutral density filter because the horizon is flat enough that it is useful for evening out the lighting difference between the ground and the sky.
Bag: No one is going to hassle you about your bag at the Jefferson. The NPS workers keep a pretty low profile there. So the sky’s the limit as far as your photo bag. Given the list of equipment I’ve given above it’s probably not surprising that I often take my large backpack with tripod attached. It is a lot of walking so bear in mind you’ll be lugging all that gear around.
Additional Resources
My Jefferson Memorial Flickr Set – I couldn’t include all of the pictures I’ve taken of the Jefferson Memorial in this blog post. If you’re looking for additional inspiration, you can find the rest on Flickr.
The Thomas Jefferson Memorial Page at NPS.gov – It’s always a good idea to check the official page for a location to see if there’s anything that’ll cause you trouble during the time of your trip.
AB Pan Photography Flickr Set – You don’t have to take my word for it. Check out a gallery of Jefferson Memorial images from a fellow DC photographer.
Monumental Thoughts – For those of you interested in the story behind some of the stonework on the Memorial, check out this post by DC tour guide Rick Snider.
Wikipedia – Some light reading about the history and construction of the Jefferson Memorial.
Summary
What: Jefferson Memorial
Where: Around the Tidal Basin
When: Sunrise, Sunset, Evening Twilight
____________________________
Lens: Wide-Angle (DX: < 18mm; FX: < 27mm) & Telephoto (DX: 18-135mm; FX: 27-200mm)
Tripod: Bring It (Full Size and/or Tabletop)
Flash: Don’t Bring It
Filter: Neutral Density
Bag: Any Size
Pingback: Photographing Cherry Blossoms in Washington, DC « PhotoTourism DC
Pingback: Photographing the Washington Monument « PhotoTourism DC
Pingback: Photographing Cherry Blossoms in Washington, DC | brandonkopp.com