I never developed a taste for the finer things; I eat simple foods, I drive a mundane car, and my apartment is sparsely decorated. I’m a simple guy, but that doesn’t stop me from becoming absolutely giddy when I see the magnificent interior of the Library of Congress. Intricately carved statues, tile mosaics, and amazing artwork cover every wall, floor, and ceiling. Every surface in that building is photographable. Buildings, at least those open to the public, just aren’t built like this anymore.
I wrote an earlier post about the Reading Room Open House that is conducted twice a year. This article covers the rest of the Library’s Jefferson Building (the Library is made up of 3 buildings).
When to Go
There is a lot of intricate detail to photograph in the Library, and people won’t get in your way for that; meaning you can go pretty much anytime. However, if you want sweeping shots of the Great Hall (see below), then you should go early. The Library opens at 8:30a.m., and it isn’t long before larger crowds start to form.
You can also coordinate your trip with a tour of the U.S. Capitol. There is an underground tunnel that connects the Library with the Capitol Visitor’s Center. This is especially nice in the case of really hot, really cold, or inclement weather. If you go to the Capitol first, you won’t have to go through security if you take the tunnel over to the Library. If you go into the Library first, however, you’ll have to go through security again. After going through security 5-10 times in a day, finding ways to decrease the number of times you have to put your belongings into a bowl is nice.
I haven’t seen monthly visitor statistics for the Library, but I’m sure that, like the rest of Washington, DC, traffic in the Library peaks between April and July and drops off considerably during the late Fall and Winter months. The Library is a great place to spend a cold winter or a hot summer day.
Photographic Possibilities
– The Great Hall –
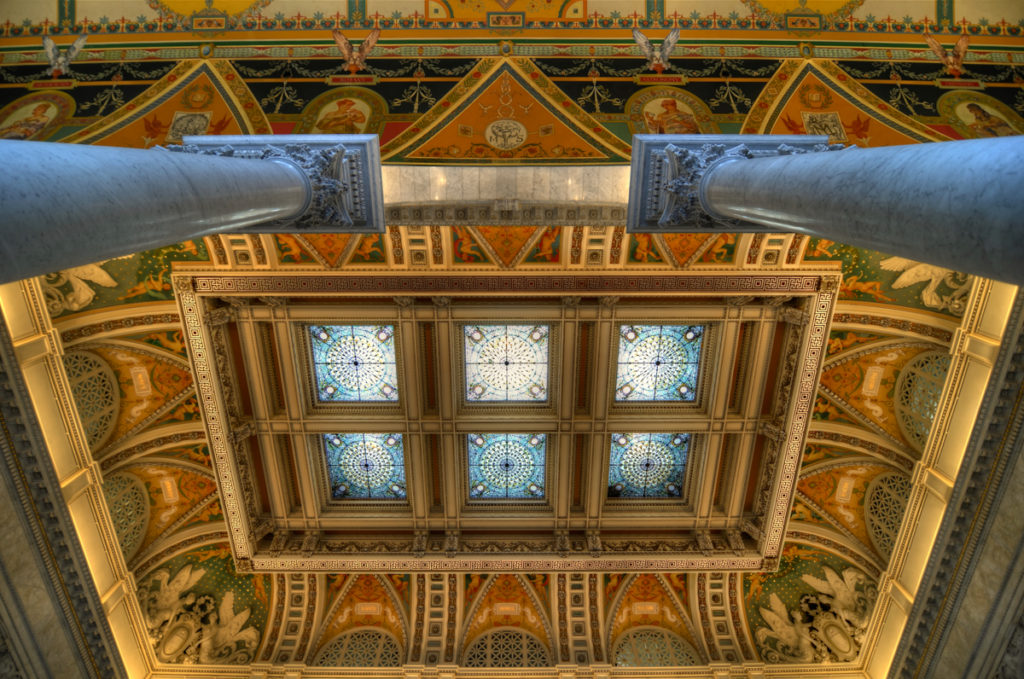
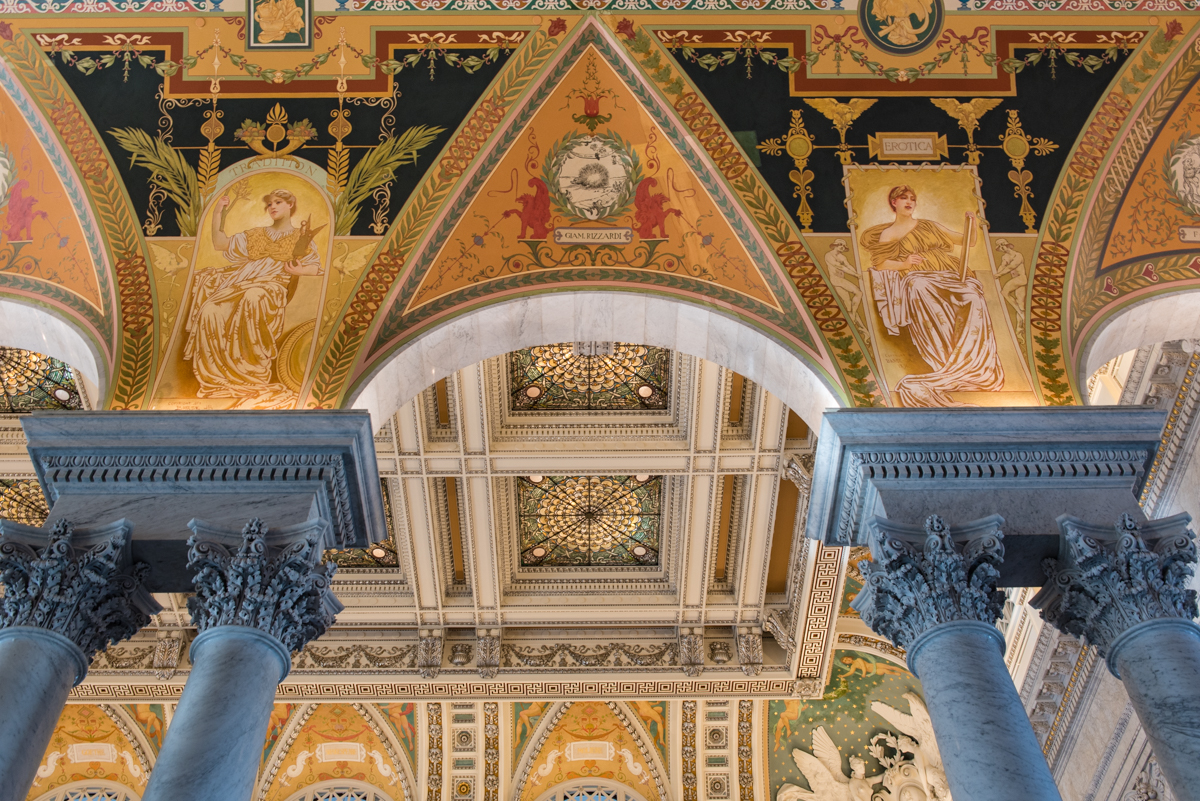
The centerpiece of the Library is the Great Hall. As you enter the Library on the first floor you take a left and walk into a 3-story high atrium. The ceiling and skylight in the Great Hall are spectacular and colorful. This is where I spend most of my time and energy when photographing the Library. You can stand in the center of the Hall and frame a nice, symmetrical photo of just the ceiling. I enjoy these “look up” photos and have a collection of beautiful skylights and murals around DC.

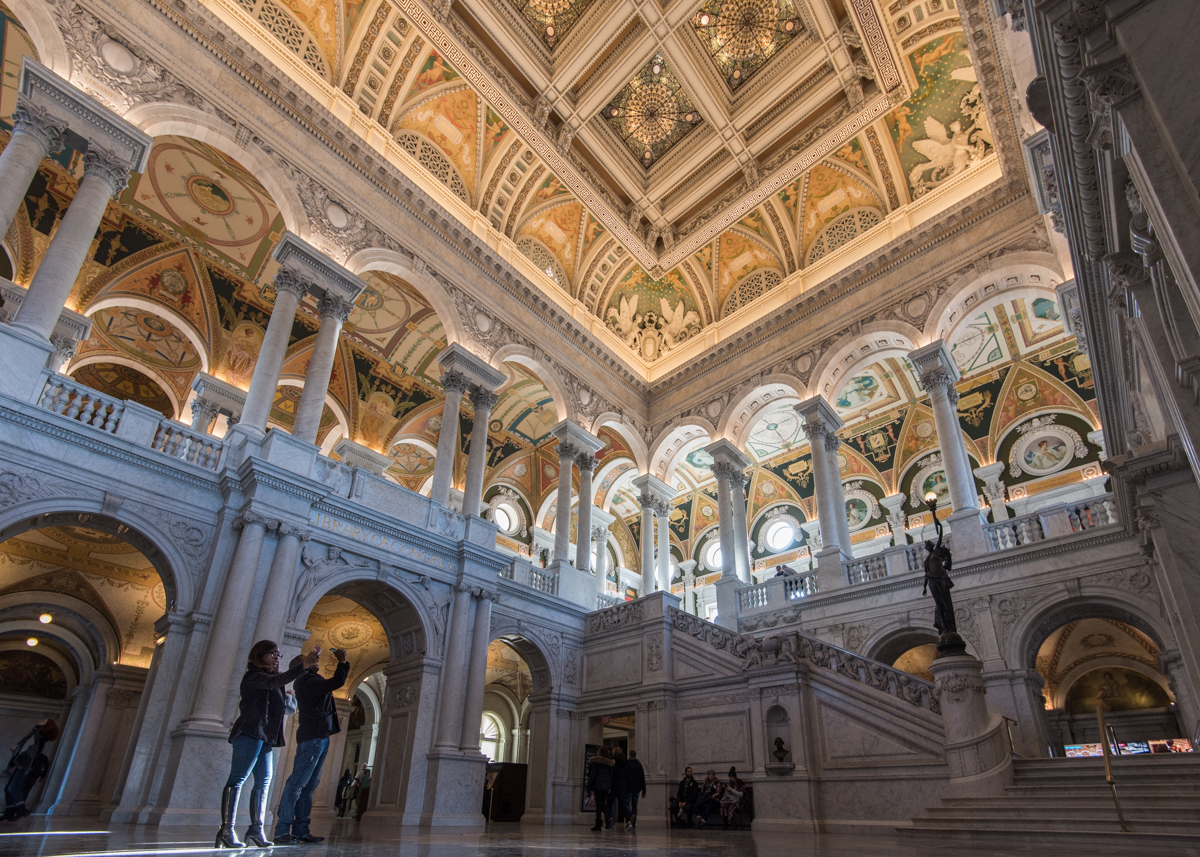
It’s preferable to include a foreground object to add a point of interest for your photos. There are two woman statues that sit on either side of the Great Hall that seem placed for just this purpose. In fact, one of the most common compositions for a photo of the Library, and one I often see in their promotional materials is one like the photos below. While this photo is common, it is difficult to do “correctly.” The photos below were taken about a year apart as my skills progressed and I spent more time composing my photos. You want to expose for the light levels on the ceiling/skylight but focus on the statue to ensure that the silhouette is sharp. Since both the ceiling and the statue have amazing detail you should try to use the smallest aperture you can and still take photos handheld. Don’t be afraid to sit down briefly to steady your camera. Finally, with the broad range of light I have had the best success with using HDR when photographing the ceiling of the Great Hall.


My first attempt After some practice
The Great Hall is flanked by marble staircases. The banisters of the staircases are covered in carvings of babies. Once you get over the oddity of the carvings, they make spectacular photographic subjects. The statues are carved to represent different ethnicities, so make your way around to see all of the ethnic (and photographic) diversity.


Finally, the floor of the Great Hall is a showpiece of the room as well. Also composed of marble, the floor has excellent texture and is ringed by symbols of the Zodiac. The best photos of the floor can be taken from the mezzanine level of the Great Hall.
– First Floor Hallways –
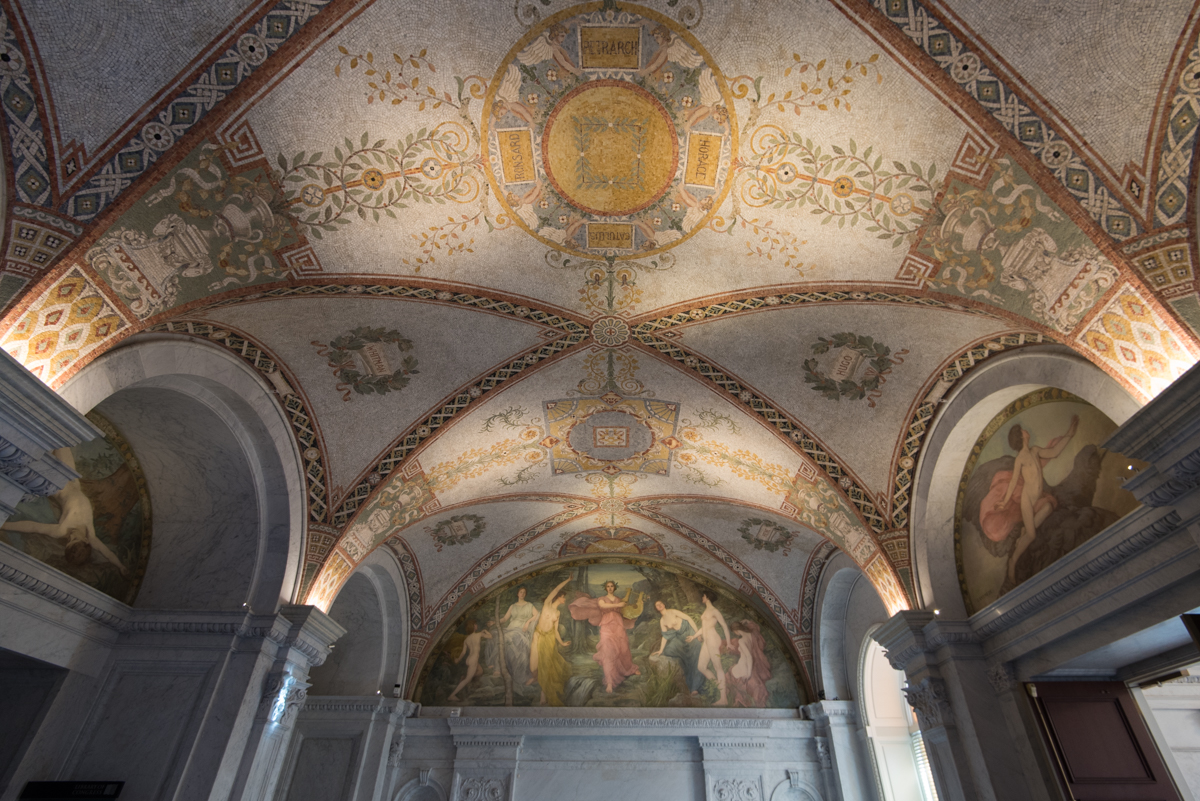
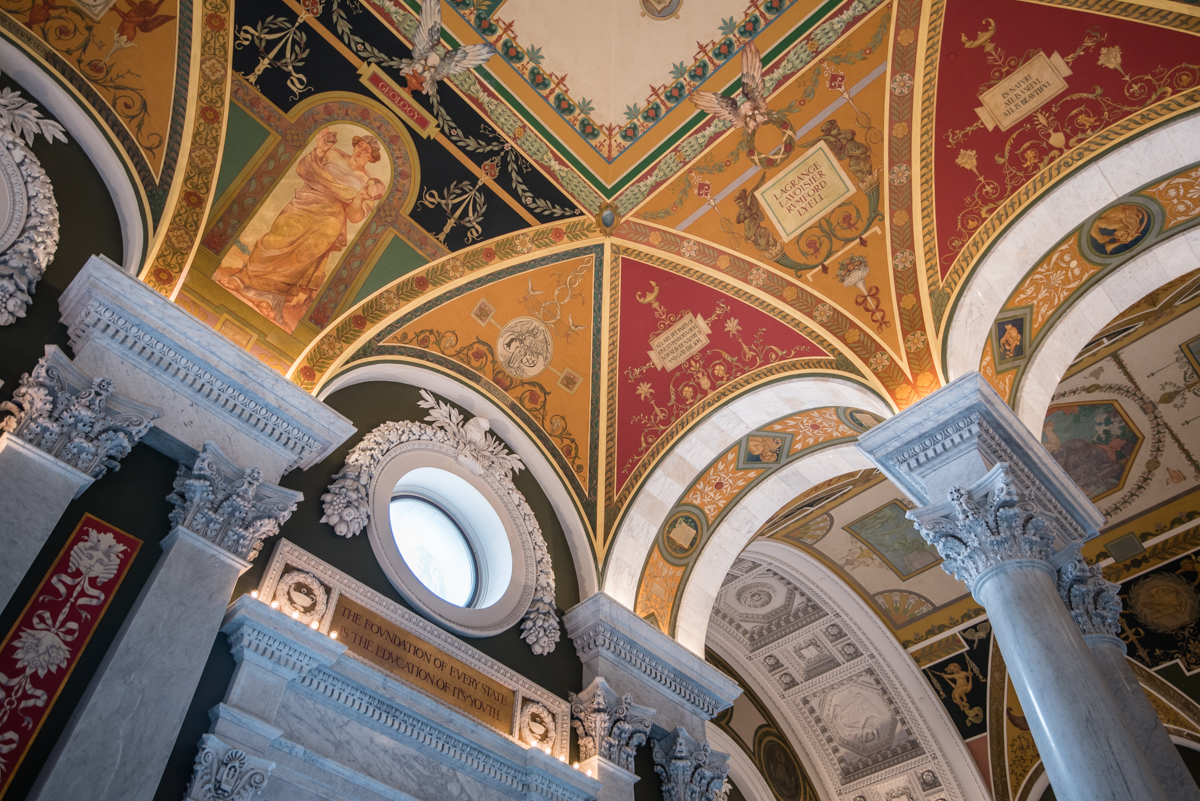
Three sides of the Great Hall’s first level are accessible (the fourth side is the entrance where you pass through security). You’ll see one of these sides as you first come in and it houses the visitors’ desk. Another side houses two, massive Bibles which you can photograph, but flash photography is not allowed. The third side is just an open hallway that circles you back to the Great Hall. Most of what is worth photographing here is not at eye level, you have to look up. The ceilings are covered with beautiful tile mosaics.
– Second Floor Mezzanine –
Much like the hallways on the first floor, the second floor mezzanine is covered with great artwork. The nature of the artwork on the second floor is slightly different however. Here, paintings and quotes cover the walls and ceiling. All four sides are accessible and look down over the Great Hall.
The second floor also has two exhibition halls; Thomas Jefferson’s Library and Latin American artifacts. Photography is prohibited in both of these halls.
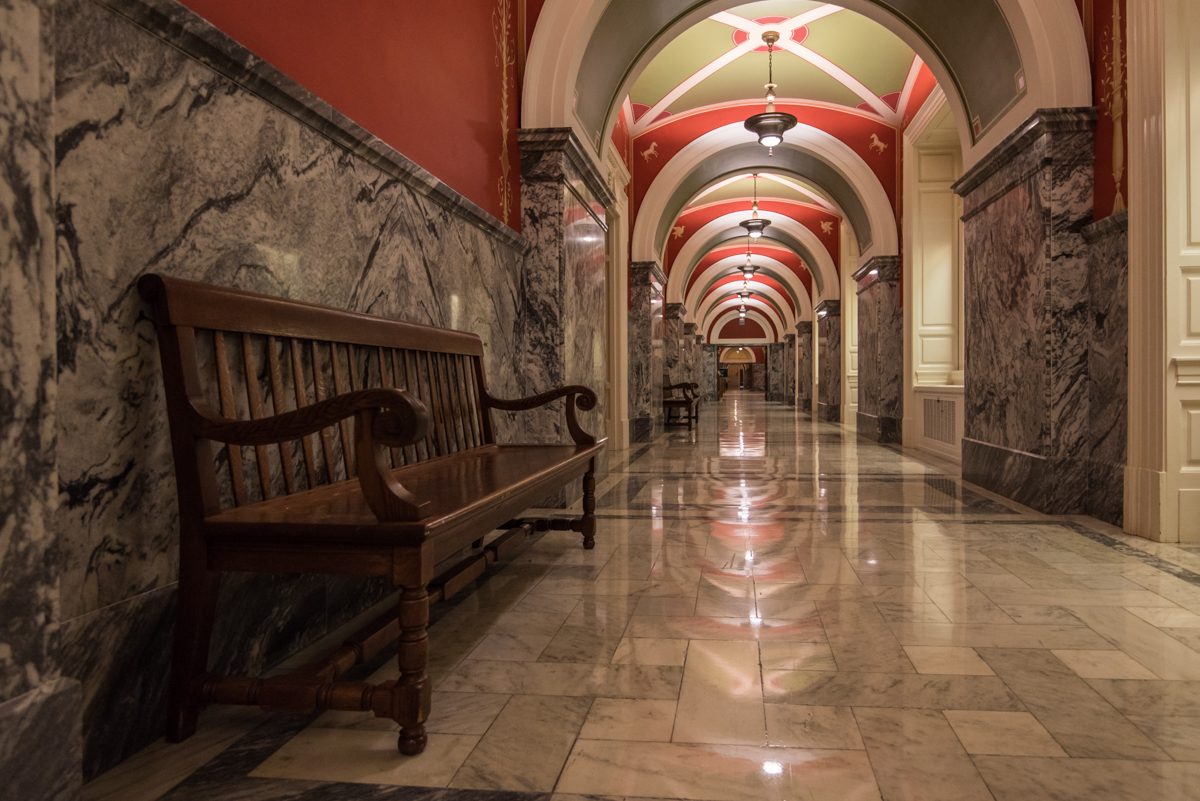
– Back Hallways –
The Jefferson Building of the Library of Congress is a giant rectangle. Everything discussed so far is one side of that rectangle. The hallways that make up the other sides are also ornate and photogenic. The photo below is on the back side of the building near the back exit.
– The Exterior –
The highlight of the Library of Congress is definitely its interior. Though the exterior is impressive, I have had little luck taking high quality photos of it. The West-facing (Capitol) side is certainly the most photo-worthy, but issues with tripod use and a tight space for taking photos due to trees and roads makes it especially difficult. If you are taking photos of the exterior of the Library, I recommend including either the dome and golden torch on top or the Trevi-like fountain located at street-level.


What to Bring
Lens: There is a wide variety of photographic subjects in the Library of Congress. Some, like the decorative carvings on the banisters in the Great Hall, you can get fairly close to. Others, like the angels statues on the beautiful ceiling, you may want to zoom in on. For this reason I recommend bringing a lens with a wide zoom range (DX: 18-135mm; FX: 27-200mm). Even 18mm may be limiting for wide-angle photos or the vertoramas described earlier, however. That’s why I also recommend bringing a wide-angle lens (< 18mm; < 27mm) for interior photos. The interior of the Library is very dim so, in addition to focal length, also consider the maximum aperture of your lens. If you have, or can rent, a lens with an f/2.8 aperture, I highly recommend bringing it.
Tripod: The Library of Congress does allow people to use a tripod if they get permission first. I’ve seen people using them. I have asked at the visitors’ desk several times how one would get permission without getting a straight answer. I would count on not being able to use a tripod while in the Library. I’ll look into this more carefully in the upcoming months and try to offer better advice.
Flash: Though it is a Library, no reading goes on in the places described in this post so the staff at the Library of Congress are comfortable with people using a flash. The exceptions to this are the areas around the Bibles on the first floor. These areas are prominently marked. In the rest of the Great Hall, however, you may find it helpful to have a hot-shoe flash with a diffuser to provide some much needed, but not intense, light.
Filters: You can leave the filters at home or at the hotel. There isn’t much need for filters inside the Library and light is already hard to come by. Adding a filter that will drop you two or more f-stops will make handheld pictures nearly impossible.
Bag: I’ve always carried a medium-sized bag into the Library. I don’t believe there are any restrictions on bag size so you could bring a backpack if you were heading elsewhere before or after. If you’re planning on coordinating the trip with a tour of the Capitol though, I would stick to medium or small; something large enough to carry your camera and a couple lenses.
Additional Resources
- Library of Congress Visitor’s Website – It’s always a good idea to check the official website of a place before visiting. You’ll find the most up-to-date information about events, hours of operation, etc.
- Wikipedia – A comprehensive read about the Library of Congress if you are so inclined.
- Don’t just take my word for it, see posts from other (more talented) DC photographers:
Pingback: Photographing the Washington Monument « PhotoTourism DC