The Basilica of the National Shrine of the Immaculate Conception…let’s just call it the National Shrine, is the largest Catholic church in America. Where it fits into the “world’s largest churches” depends on whether you look at height, volume, area, etc., but there is no doubt that the National Shrine is huge.
I love large, interior spaces and in August 2011 there was an earthquake that damaged most of these types of buildings in DC, but spared the National Shrine. With safety netting obscuring many other beautiful interiors, I decided to check out this immense building that I had rode the DC Metro’s Red Line past for years. I’m glad that I did.
I am not a religious person, but my love of architecture, color, and vast interior spaces has brought me back to the National Shrine several times over the years. I consider the National Shrine a hidden gem in Washington; not exactly a must-see, but if you love photographing architecture, religious design, or if you’re looking to get out of the rain, snow, or cold, it should definitely be on your list.
When to Go
According to their website, the National Shrine receives over a million visitors a year. I don’t know how those visitors are distributed across the year, but you can bet that traffic will be much higher around Christmas and Easter and, of course, on Sundays. In DC, it’s always a safe bet that May – August will be busy as well.
Regardless of what time of year you go, you should take a look at their hours of operation and mass schedule before visiting. The National Shrine is open 365 days of year and their hours are 7 a.m. to 7 p.m., April 1st – October 31st and 7 a.m. to 6 p.m., November 1st – March 31st. I would say get there early, but masses tend to be clustered in the morning. Avoid masses, if possible. As I said before, the building is huge and there is a lot to see even when a mass is going on, but you run a greater chance of interfering with someone’s religious experience if you go while a mass is going on. I’ve gone on weekday afternoons and on Saturdays and it has never felt crowded.
Photographic Possibilities
The National Shrine has a number of great photography opportunities. It has the cavernous nave, of course, but it also contains a number of smaller chapels. There is also a dark (somewhat difficult to photograph, but worth it) crypt.
-Photography in the National Shrine-
Rules are never fun, but before we delve too deeply into what there is to photograph, we should cover some etiquette and what you are allowed to do with the great photos you take. The National Shrine has an extensive photo policy and they can ask you to stop taking pictures. I have been there several times and have never been asked to put my camera away. I do my best to be respectful, staying out of people’s way and being aware of the noise the mirror on my camera makes. Despite the dim lighting in many places, you should turn your camera’s flash off. Not only is it annoying to have the flash go off in an otherwise dim space, it can also damage artwork.
The photo policy also makes it clear that the National Shrine is very protective of the copyright of the artwork within the Shrine and the view of the exterior. I suggest you read and decide for yourself, but the gist is that no commercial photography is allowed. Photos should be for personal use and sharing only, not for sale. I should say that this blog does not generate revenue and, in my opinion, does not fall under commercial purposes.
-The Exterior-
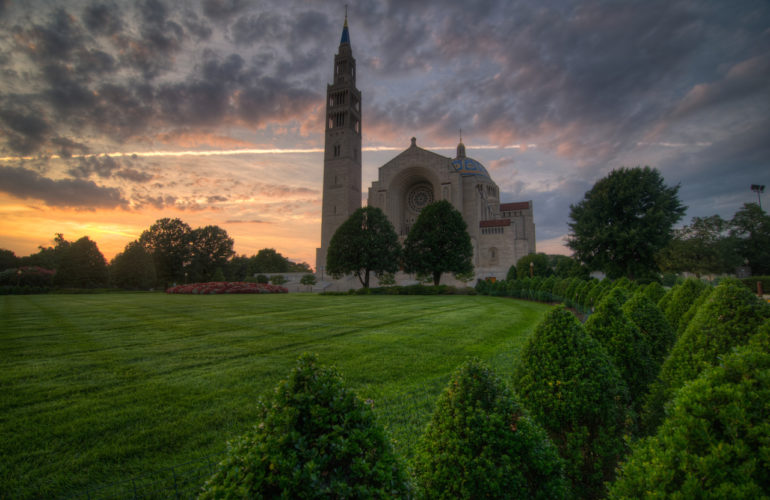
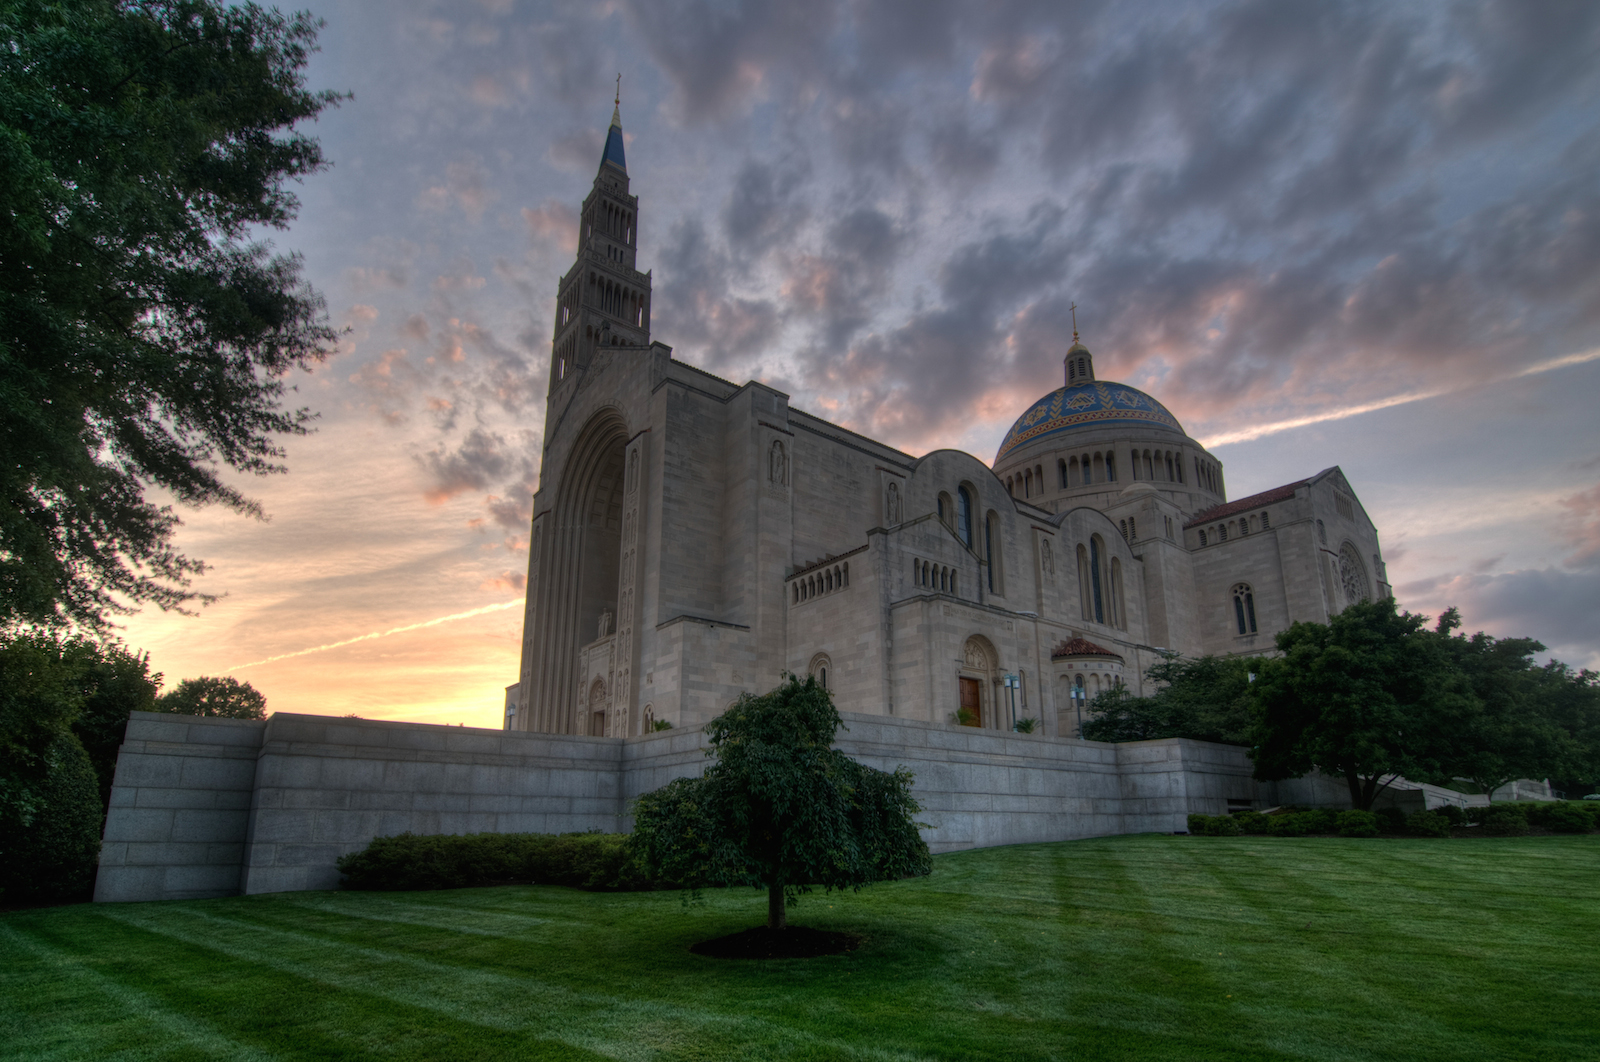
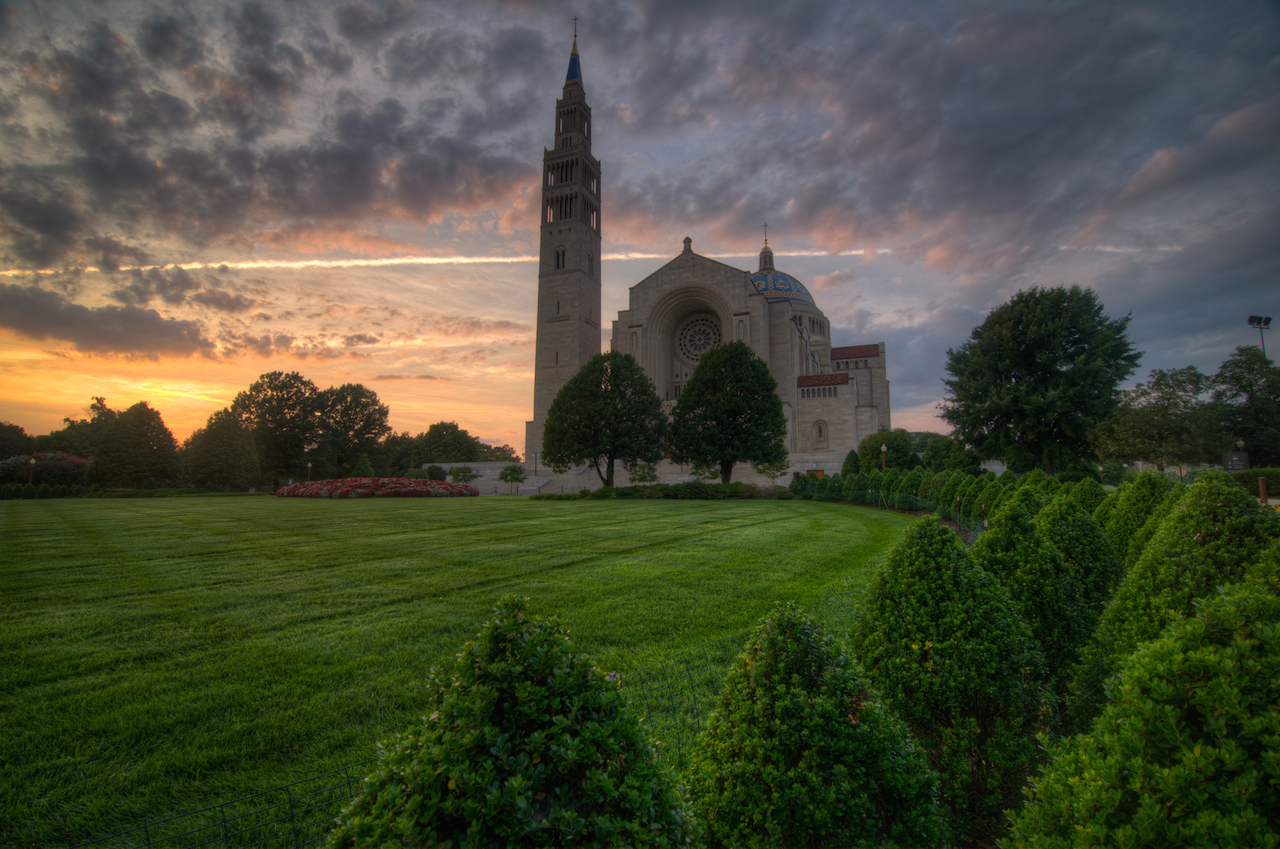
I would not consider myself an expert on photographing the outside of the National Shrine. I photographed it once or twice on my way in or out, but was never happy with the results. I made one special trip down to capture the Shrine at sunset and happened to catch a great one. The photo that led off this post was taken on that night from position (2) on the map above. There is an open area to the East of the National Shrine that will allow you to back up far enough to capture the whole thing, even with a narrow focal length lens. It is not ideal however because there is a parking lot and a number of light polls that get in the way. I took most of my pictures from right next to the Shrine using a wide-angle lens.
There are also a number of great photo opportunities in front of the National Shrine. The landscaping is well-maintained and there is a large roundabout, with grass, flowers, bushes, and trees in the center (1). It offers a diverse set of compositions. You will occasionally have to wait for cars to move through, but after church hours, there is very little traffic.
– The Interior-
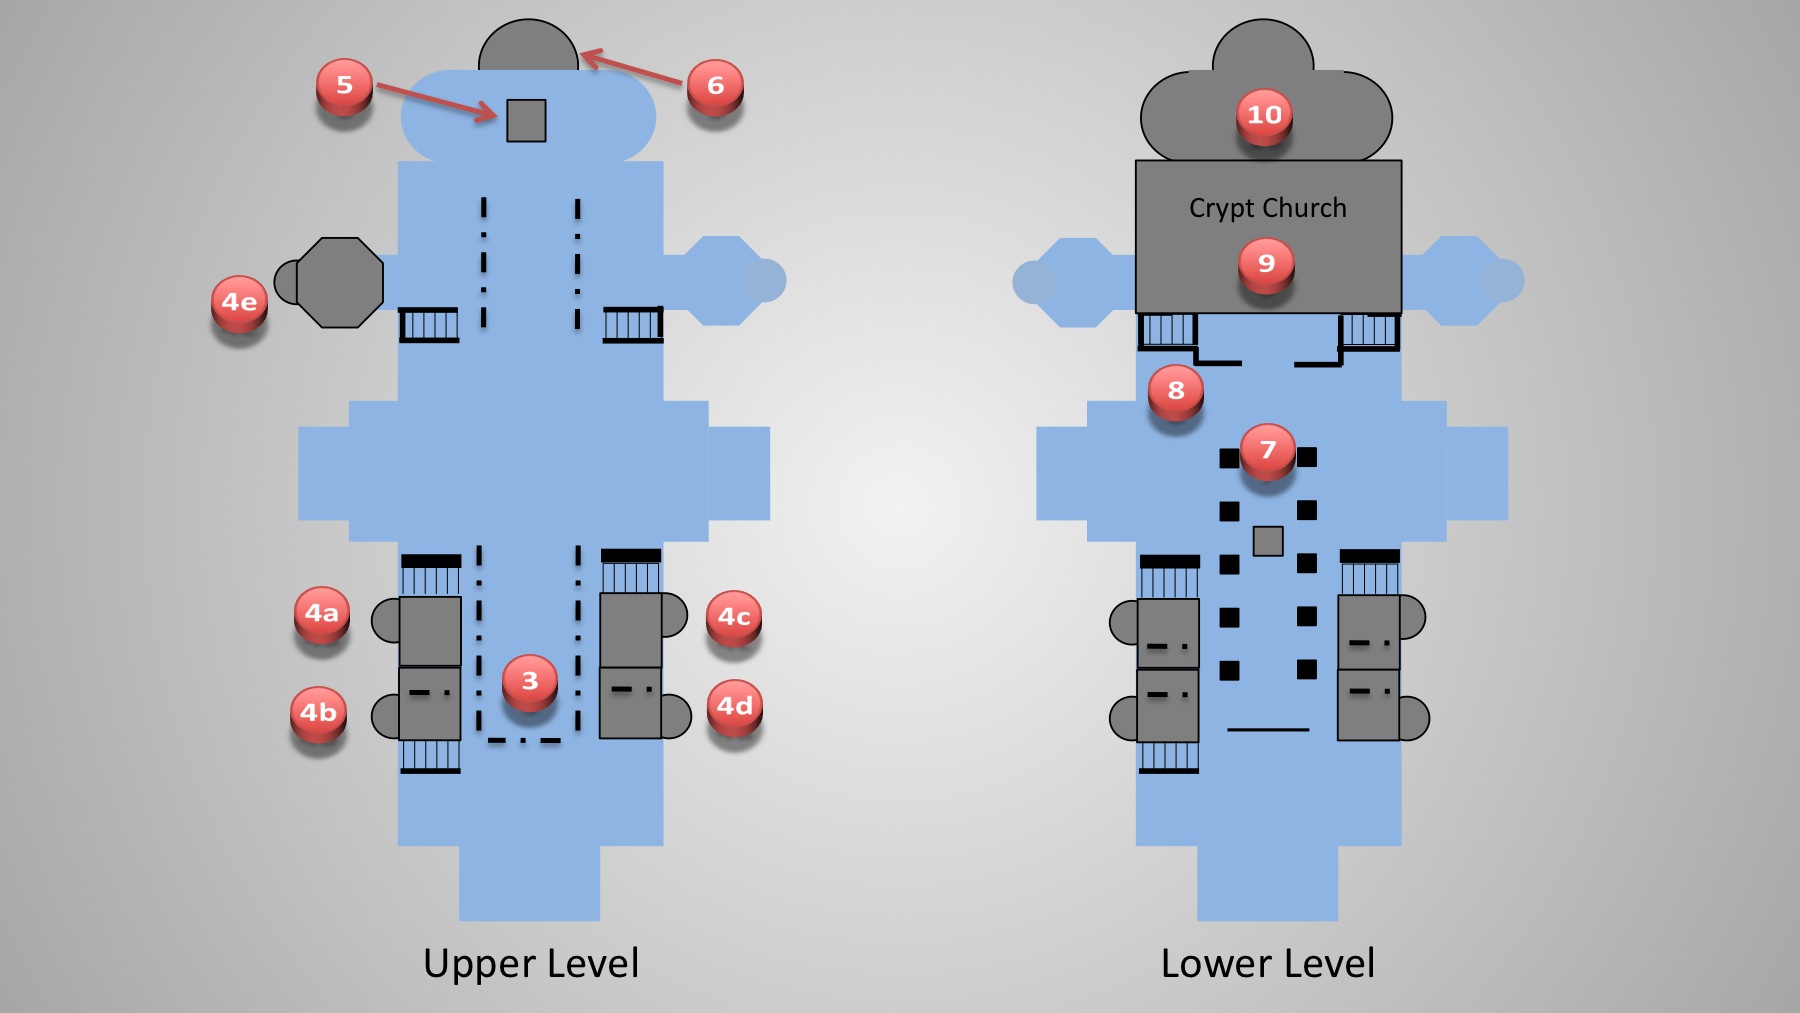
 If you enter through the front doors of the church you will find yourself on the Upper Level. In the descriptions below, we will walk a loop around the Upper Level before heading downstairs. I had to look up a lot of these church architecture terms (e.g., nave) so I wouldn’t sound like a complete idiot by calling them what I might in regular conversation (e.g., that place where the pews go).
The Nave (3) – The thing that first attracted me to the National Shrine was the prospect of a towering interior space and it certainly delivered. It is massive. So massive, in fact, that it is difficult to capture it in landscape orientation (even with a wide-angle lens). As you can see in the photo to the right, the nave is capped with several golden domes. There is also a blue one that is not pictured. It also features the stained-glass windows that you would expect in a cathedral. While I generally try to avoid including people in my photos, it is not always possible and here gives a much needed sense of scale.
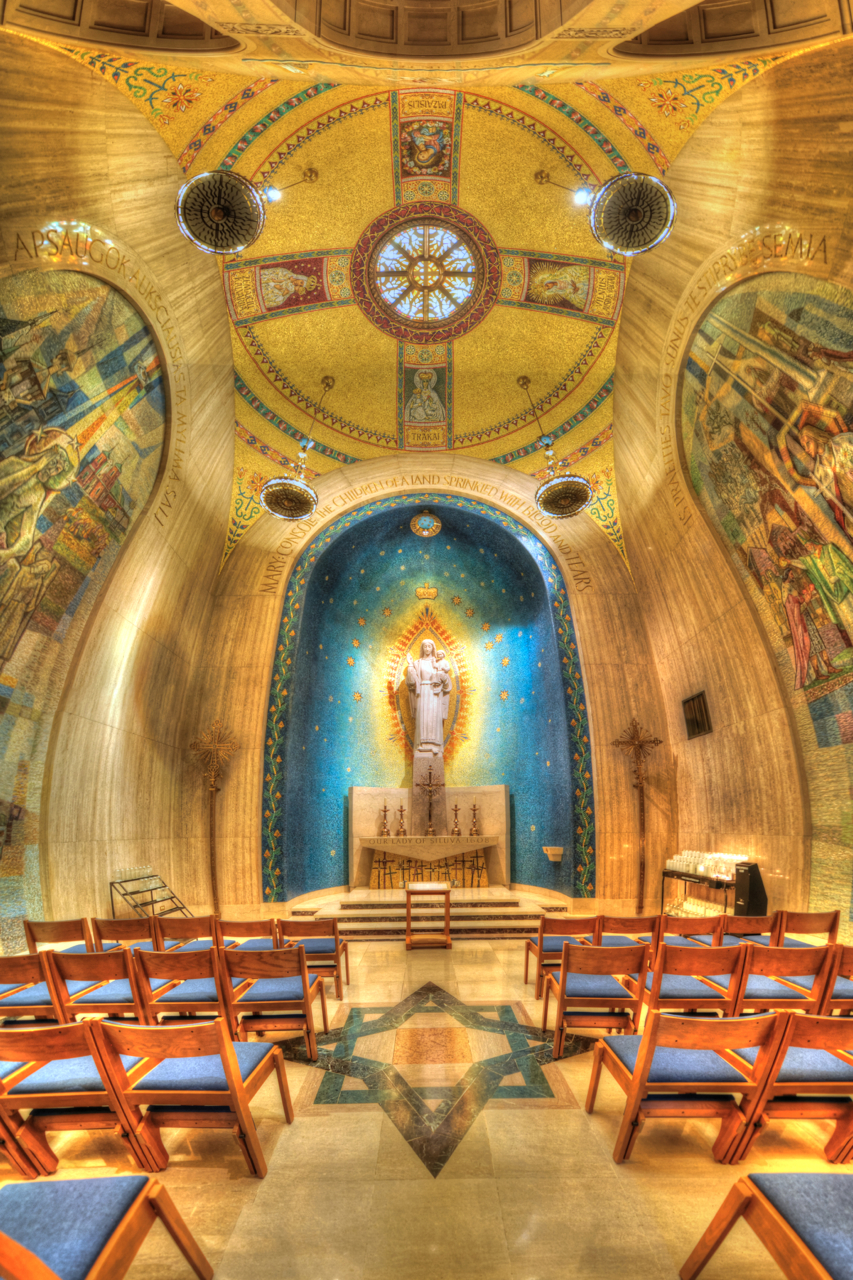
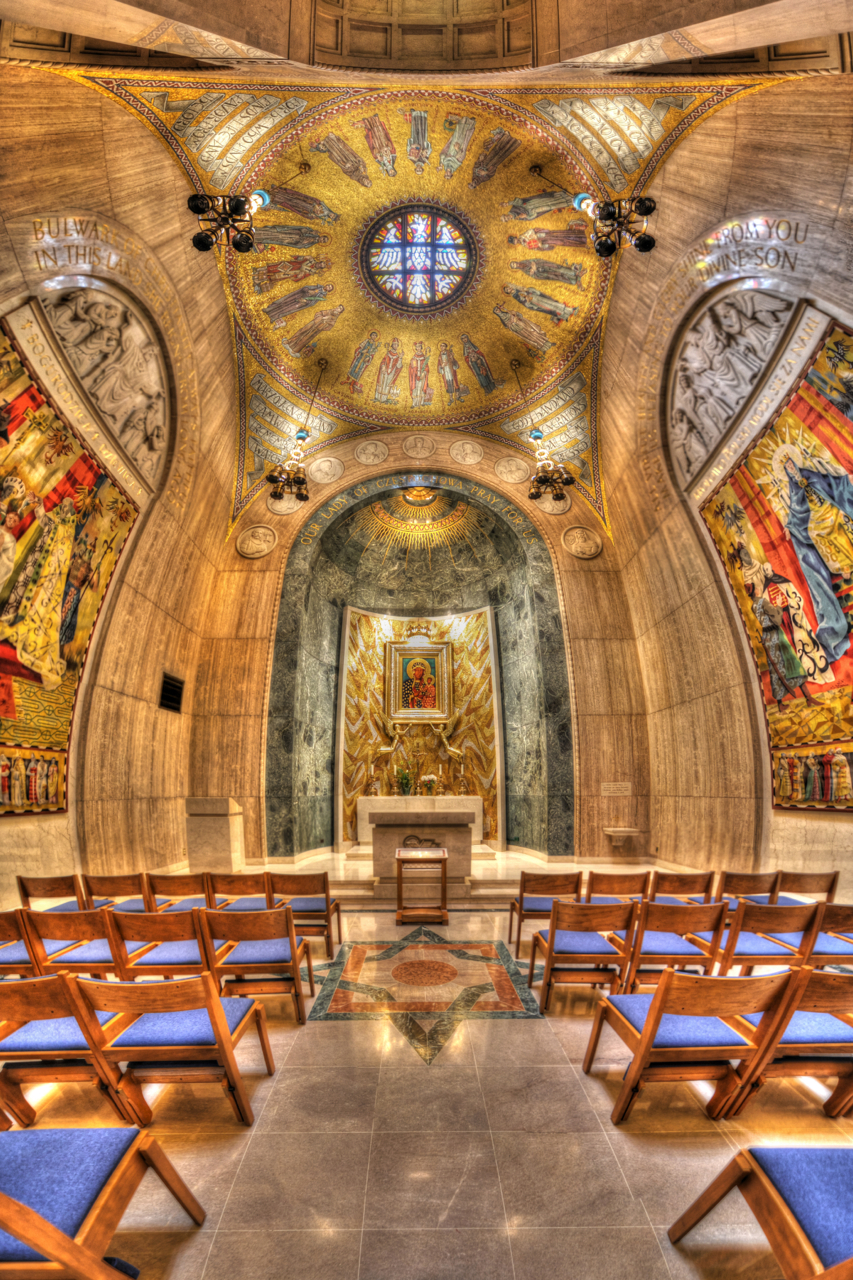
The Side Chapels (4) – One thing I was not expecting when I went was the series of side chapels that are big enough for 20-50 worshipers. There are several on the Upper Level and some more on the Lower Level. The photos below show some examples of the side chapels on the Upper Level. Each of the side chapels has a different character and color palette which allows for some diverse photo opportunities. In each, the main foci (for me anyways) were the alter and the ceiling. It was difficult getting both into the same photo, even in portrait orientation, so I took vertoramas. Vertoramas are like panoramas, except taken vertically. Each of the photos below is stitched together from 8-11 landscape orientation photos. The side chapels are not as well lit as the nave and require some steady hands. I usually set my ISO around 1250 and aperture to f/2.8, anything to get to the shutter speed to at least 1/30s.
The Altar (5) – Not Pictured – There are velvet ropes ringing the church’s sanctuary, but you can still get a good view of the altar which sits below a baldachin (definitely had to look that one up) with four marble columns.
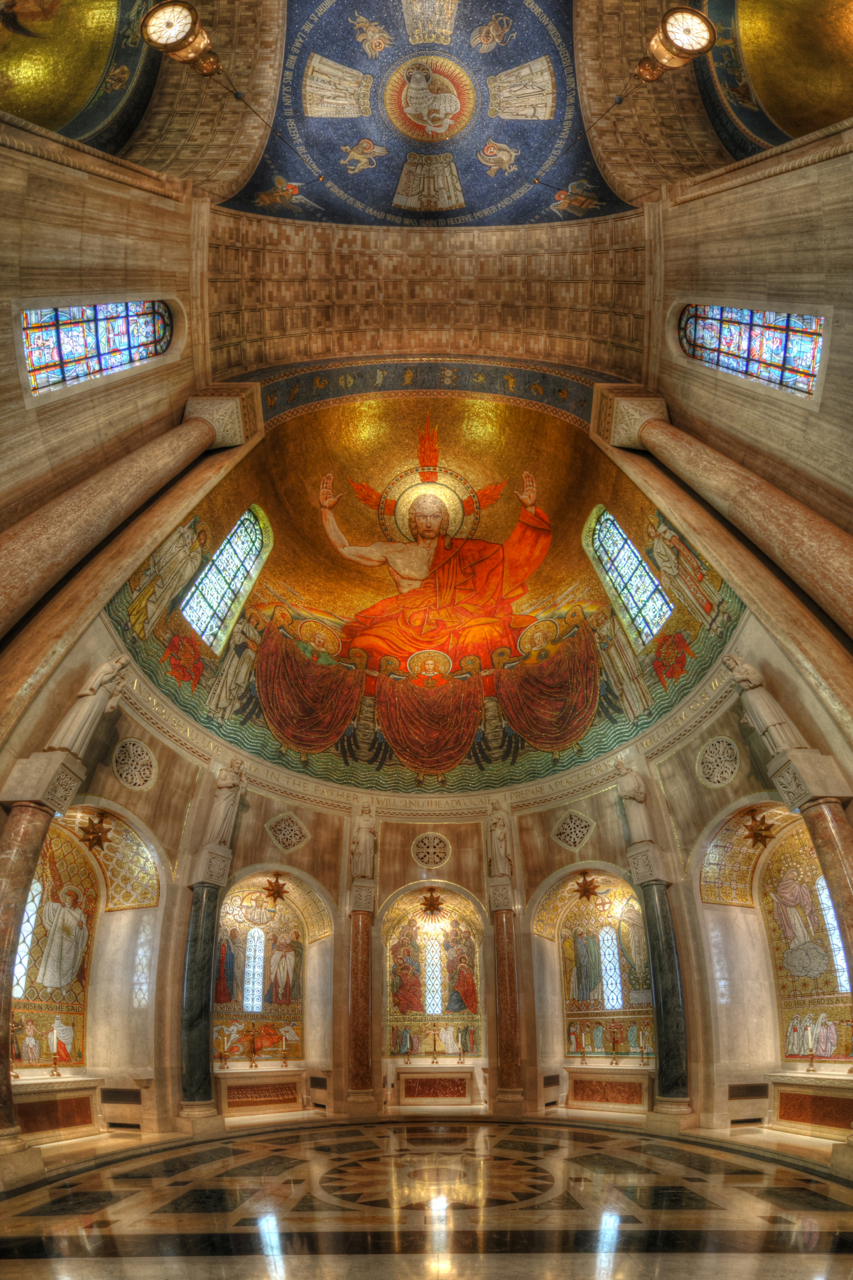 The Apse (6) – Behind the sanctuary, there are three recessed domes. Like the side chapels, these each have their own character. The one immediately behind the sanctuary, visible throughout the cathedral, has a large depiction of Jesus.
Next we’ll move to the Lower Level. There are several staircases visible on the map.
Memorial Hall (7) – Not Pictured – In the center of the lower level, there is a long hall broken up by black pillars with a statue of the Virgin Mary in the center. Nearly every surface in this room is covered with writing. I’m not sure what the writing is about so I won’t venture a guess. Regardless, the various colors and textures in the room make for a good photo opportunity.
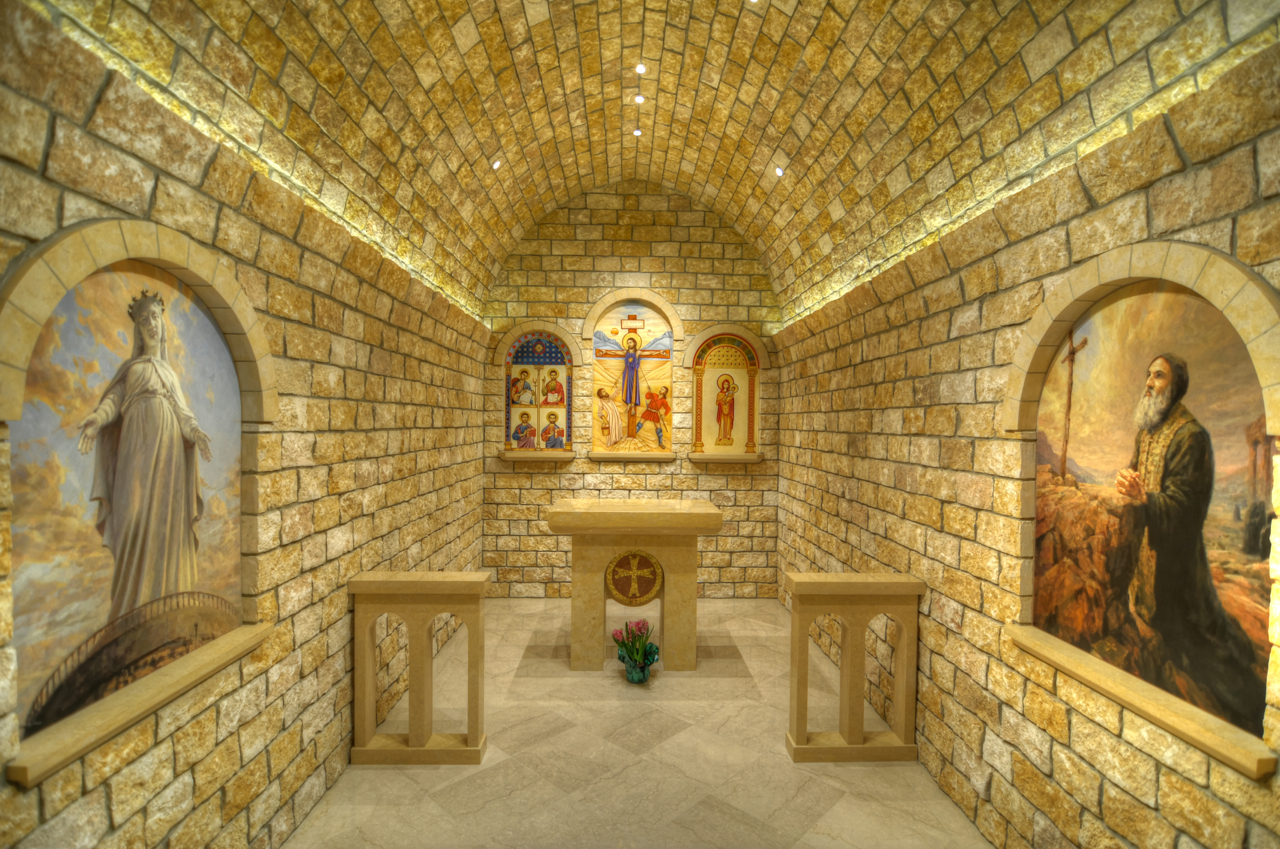
A Little Side Chapel (8) – I was particularly fascinated by this small, individual size side chapel on the lower level. It is wonderfully lit. While much of the National Shrine is dim and difficult to photograph, this little room has an abundance of light. I also found the brick texture and artwork particularly inviting.
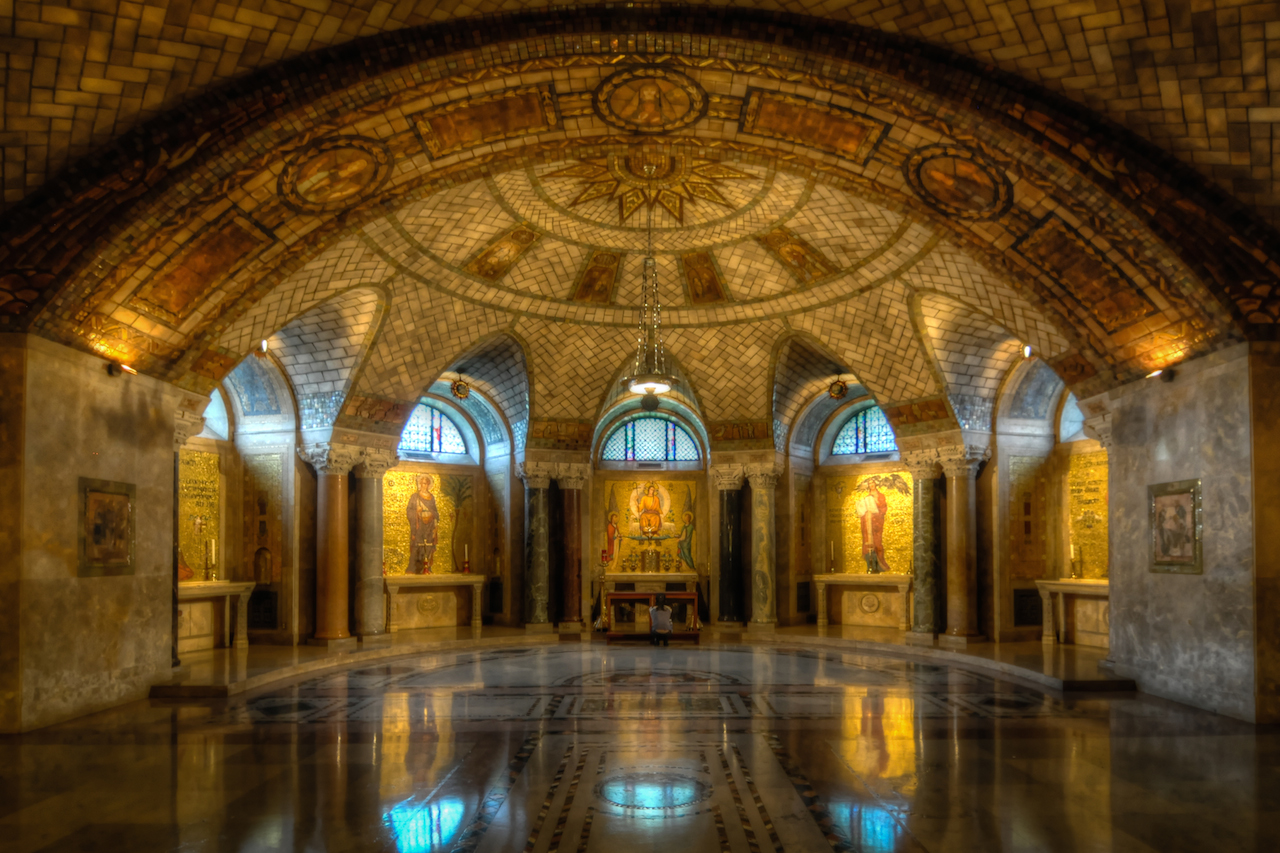
The Crypt Church – On the far, back end of the Lower Level you will walk through a set of glass doors and find yourself in a dimly lit, almost dark chapel with rows of pews.
(9) (10)
What to Bring
Lens: Wide-Angle. Every photo in this post was taken with an 11-16mm lens on a DX format camera (16-24mm on an FX). There are plenty of closer detail photos to be had, but I like to fit as much into the photos as possible. The side chapels especially are very tight. You can get the ceiling OR the alter. In fact, I couldn’t even get the photos I wanted with the wide-angle lens, hence all of the vertoramas in this post.
Tripod: Leave it. You cannot use a tripod in the National Shrine without permission. If you’re planning on taking photos only on the interior, don’t bother bringing it. I used my tripod for the exterior photos without trouble, but there was also no one around. If you’re planning on using yours, I think you’ll be fine so long as you stay out of the flow of traffic.
Flash: Leave it. The flash isn’t going to do you any good on the outside and as I said earlier, it can be bothersome to people there for worship or damaging to artwork. The National Shrine’s photo policy does say handheld lighting equipment is permissible.
Filters: Leave them. I love using the occasional neutral density or circular polarizing filter, but they are not very useful for interiors. They are especially bad in dark interiors like the National Shrine where you are already pushing the bounds of steady camera holding.
Bag: Medium. When I go to indoor places around DC, especially museums and churches, I like to keep a low profile. A backpack can bump into people or, even worse, paintings or objects. In places where people can ask me to leave or put my camera away, I like to make sure there’s nothing that draws their attention to me. A medium shoulder bag allows me to carry my camera, a lens or two, my strap, and lens cleaning equipment.
Additional Resources
- National Shrine’s Visitor Page – If you don’t want to take my word for it, you can get information straight from the source.
- National Shrine’s Photo Policy – In case I didn’t plug it enough in the article, I recommend checking out their photo policy to make sure you don’t violate any rules.
Summary
What: The Basilica of the National Shrine of the Immaculate Conception
Where: 400 Michigan Ave NE, Washington, DC 20017
When: 7 a.m. – 7 p.m., Apr. 1st – Oct. 31st & 7 a.m. – 6 p.m., Nov. 1st – Mar. 31st
____________________________
Lens: Wide – Angle (DX: < 18mm; FX: <27mm)
Tripod: Leave it.
Flash: Leave it.
Filter: Leave them.
Bag: Medium Size Bag if Going Inside



3 thoughts on “Photographing the Basilica of the National Shrine of the Immaculate Conception”