If you were to ask me, “What is the one thing I should photograph in Washington, DC?” I would say without hesitation, the U.S. Capitol Building. It is, by far, my favorite photo location and nothing is more quintessentially Washington. It took me several months to discover this, but the interior of the Capitol is as amazing as its exterior. I was intimidated about going into the Capitol because I didn’t know what to expect or how to arrange a tour. If you have the same concerns, I will attempt to put you at ease with this article. A tour of the Capitol is a definite must-see for photographers visiting DC.
Before I get into the usual PhotoTourism DC details, I’ll give you a few pieces of information specific to visiting the Capitol that you’ll want to know.
Scheduling a Tour
 You have several options for getting scheduled for a tour. (1) You can arrange a tour by calling or visiting the website of your state’s Senators or your district’s Representative. Different offices handle this differently. Some will offer a staff-led tour and some will simply schedule you for the regular tour. Your Congressperson’s office can also get you a floor pass for the House or Senate Chamber, but there is no photography allowed in either. (2) Your second option is to arrange the tour yourself by going to the Capitol Visitor Center website and filling out their online form. For Options 1 & 2, you will be given a day and time to show up; tours start about every 20 minutes. (3) Finally, you can just drop into the Capitol Visitor Center and try to get walk-in tickets. There are a limited number of these tickets available, but 2 of the 3 times I’ve toured the Capitol I’ve gone this route and have had no trouble getting tickets. In fact, I walked in and got tickets for a tour group starting right away; no waiting around. The smaller your group the easier it will be to get walk-in tickets.
You can visit the Capitol Visitor Center any time, even without a reservation for a tour. There is a cool, though small, museum that shows the history of the Capitol Building. Note: To protect the documents, photography is not allowed in the exhibition hall.
The Tour Itself
Tours of the Capitol last a little over an hour and are guided. That is, you and about 30 people will follow a tour guide who will give you great information about the history of the Capitol. You will get a headset that is tuned into the frequency of your tour guide’s microphone so they don’t have to shout at you. There are a dozen or more, 30-person tours going on simultaneously so there will be hundreds of people you have to jockey with to get photos. You can’t wander too far from your tour group, though you shouldn’t feel like you’re stuck in a certain place either. When I’ve been on the tour, I’ve been comfortable moving around big open spaces like the Rotunda to get into a better position for photos. Just be sure that you (1) stay within radio range of your tour guide so you know when they are moving the group to a new location, (2) remember what your tour guide looks like so you can find your group amongst the dozens of others, and (3) be respectful and stay out of the way of the other tour groups.
When to Go
-Time of Day-
Regular guided tours are offered Monday – Saturday; 8:30 a.m. – 4:30 p.m. (last tour starts at 3:20 p.m.). Congressional staff-led tours may follow a different schedule. I always suggest getting to places early if you want to avoid crowds, but it’s hard to say with the Capitol tours. If there is a tour scheduled for 8:30, then the people that are ticketed will be there. If you’re trying to get walk-in tickets then earlier is always going to be better. They may not be able to get you into the first round of tours but they can get you a ticket for some later time and you can come back.
-Time of Year-
I generally recommend people visit Washington, DC in the Fall (September – November). The temperatures are pleasant and there are fewer people. This applies to Capitol tours as well. Not only are there fewer people to contend with during the “off-season,” but the tour itself is different. Below I’ll describe some of the areas that you don’t get to see on the regular “on-season” tour. I asked a tour guide why the tour changes sometimes and she said that, when it’s busy, there are too many people to take into some areas of the Capitol. She didn’t say what months specifically, but April – August are peak tourism months around DC. Coming outside of that time will probably be your best bet.
You might also find it interesting to plan your trip for a time when Congress is in session. That way you can get in to see debates, if you’re interested in that sort of thing, but there is also the potential of seeing the Congressmen and women wandering through the Capitol. Schedules for the House and Senate are published in advance, but change depending on deadlines and procrastination.
Photographic Possibilities
A tour of the Capitol starts with a video called “Out of Many, One” (E Pluribus Unum for my Latin-speaking readers) that describes the history of Capitol construction and highlights major pieces of legislation that were passed there. It lasts about 20 minutes and I think it’s fantastic. No photo opportunities there though.
After the movie, the theater full of people is divided up into tour groups. You’re given a headset and begin the tour. The “usual” tour consists of 3 parts; the Crypt, the Rotunda, and Statuary Hall. I will describe each of these and then some of the less common areas on the tour.
-The Crypt-
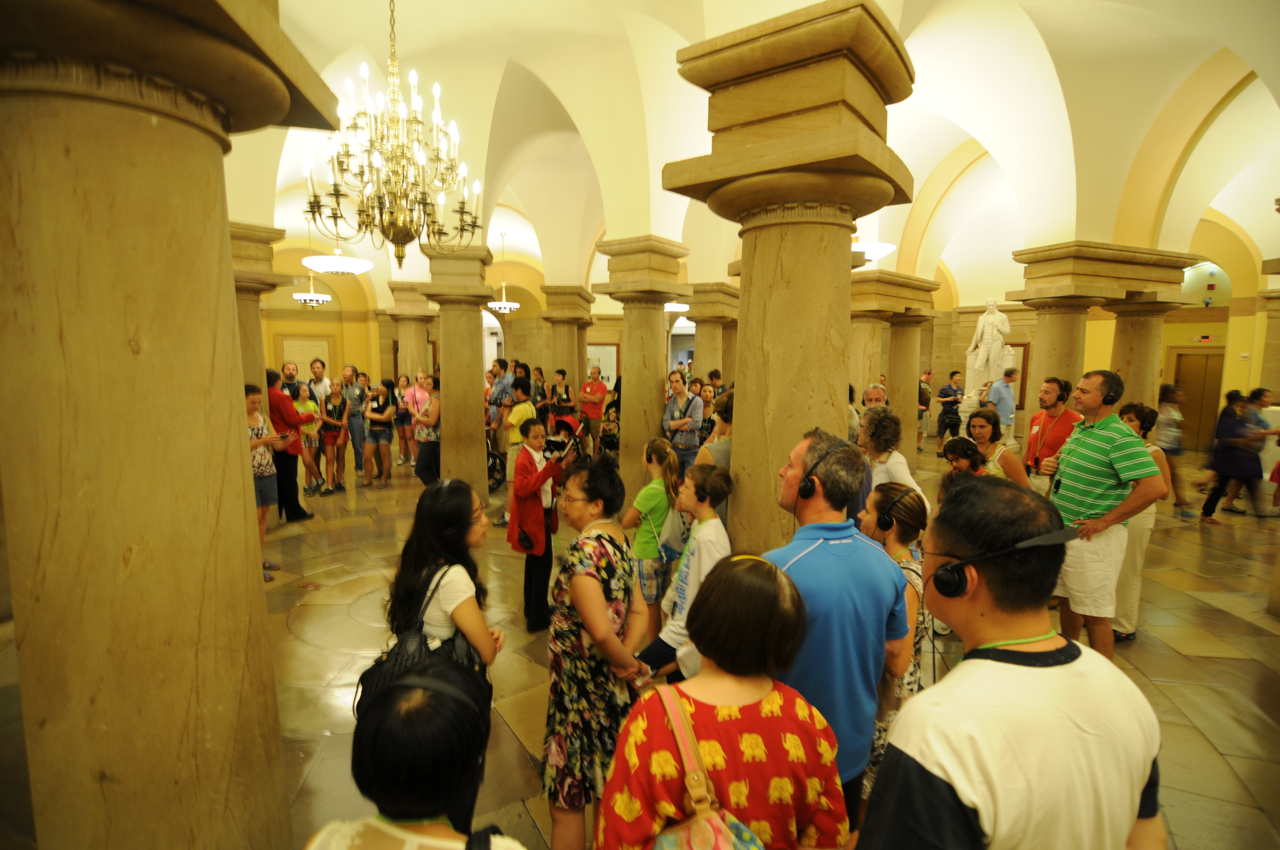
From the Visitor Center you take an escalator to the Crypt level of the Capitol. This a large circular room with columns dispersed throughout. This is where George Washington was supposed to be buried which is why they call it the Crypt. Aside from the columns, another noteworthy feature of the room is the marble “compass stone” at the room’s center. This is what divides DC into NE, NW, SE, and SW quadrants (helpful to know when you’re trying to get around town). These tidbits, about George Washington and the compass stone, are examples of the interesting info you get while on the tour. So while you’re taking your photos don’t forget to listen to your tour guide.
- Despite the size of the room the columns make the space feel claustrophobic. You have to be patient and look for an opportunity to take a photo that isn’t filled with people.
- If you’re using automatic white balance, be sure to check your first couple photos. I was using automatic white balance when I took the photos below and you can see that the one on the left turned out yellow. The one on the right was the same but I converted it to black and white and that helped.
-The Rotunda-
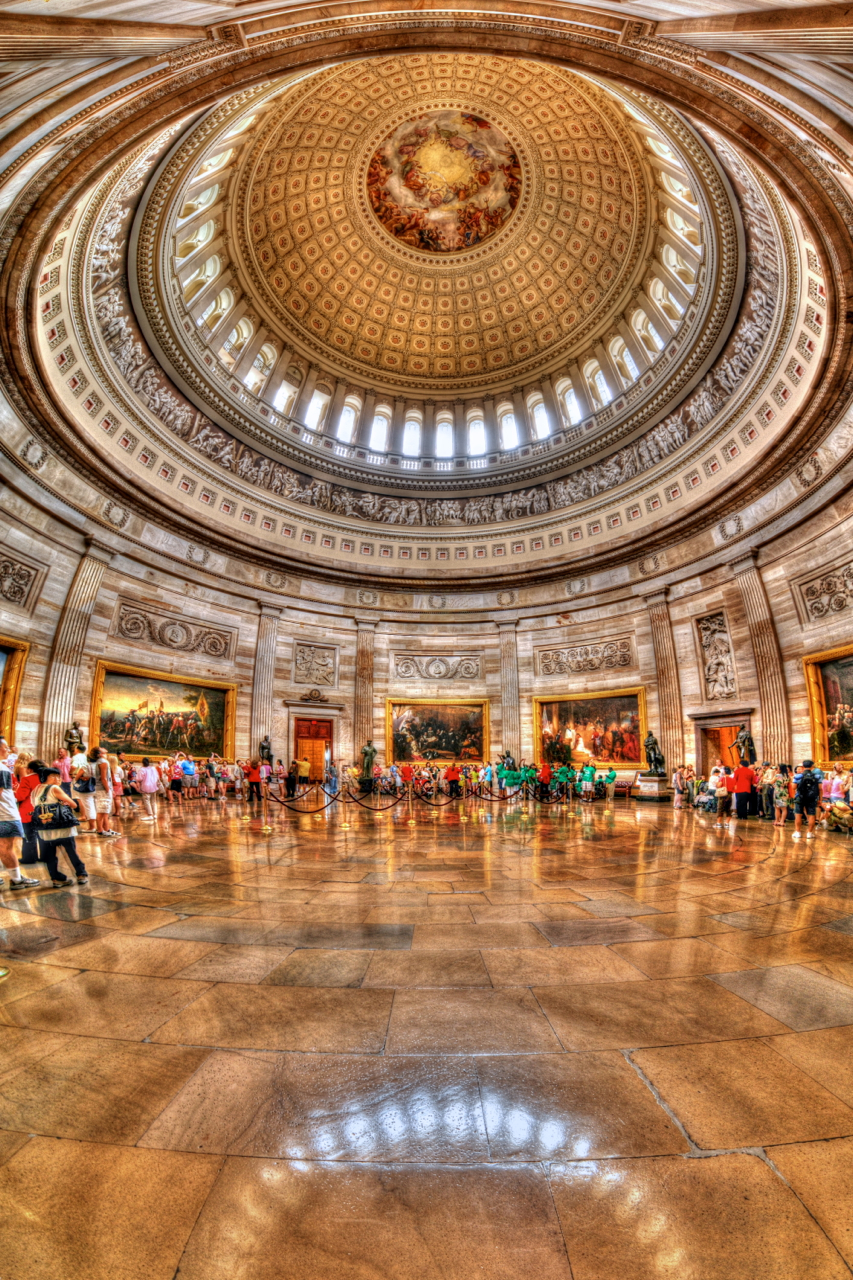
After the crypt you walk up a long staircase into the Capitol Rotunda. The Rotunda is one of the most impressive indoor spaces I’ve ever been in. It ranks up there with St. Peter’s Basilica and the Sistine Chapel; and it incorporates impressive design elements of these amazing rooms. It is an imposing room, 96 feet across and 180 feet high, capped with a mural covered dome.
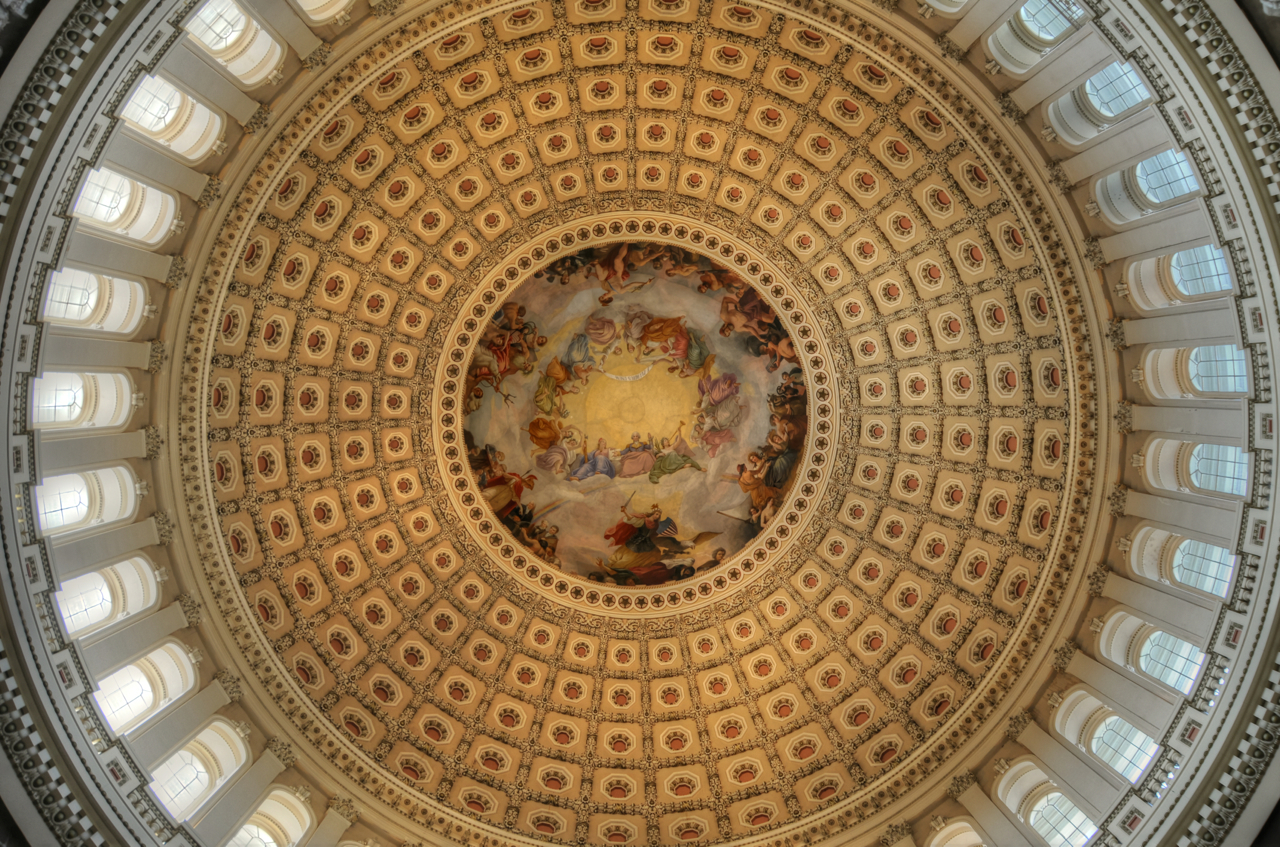
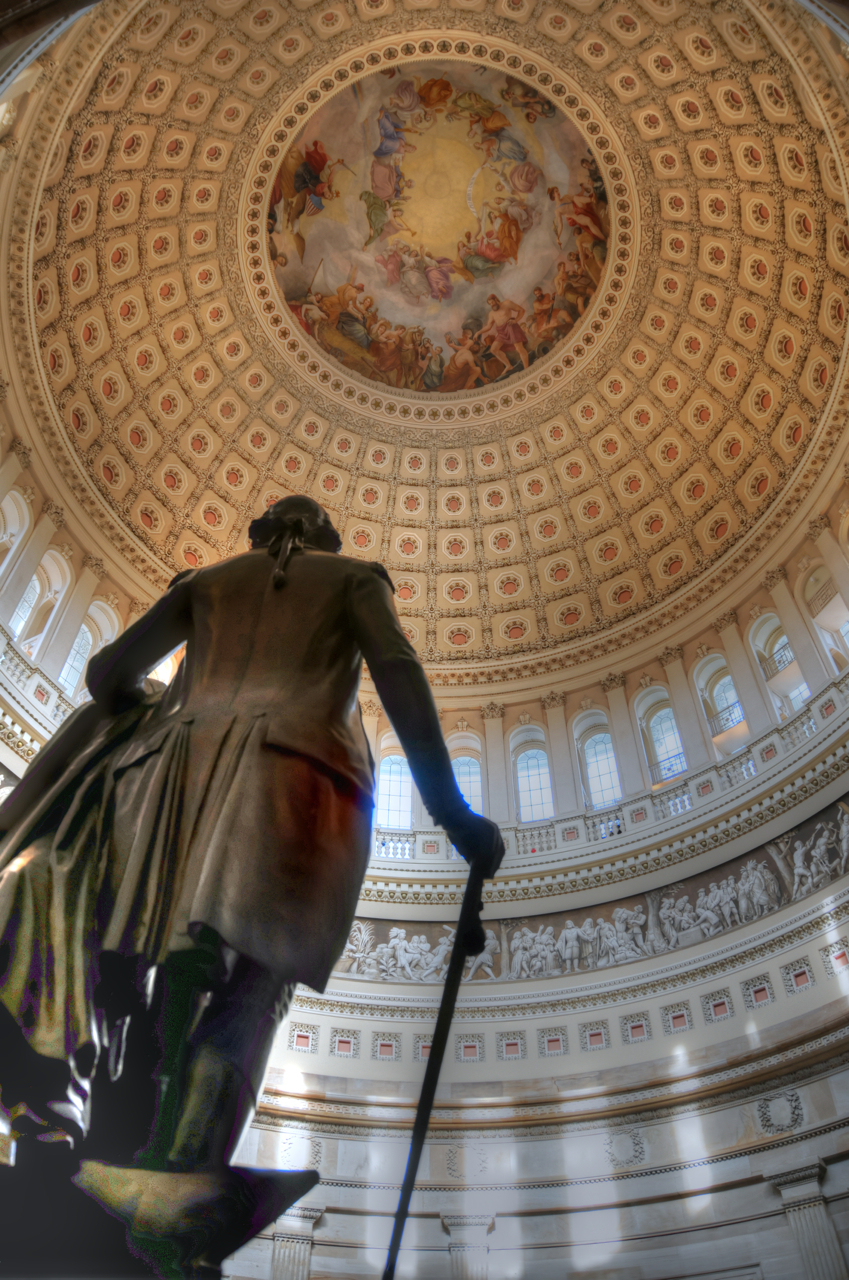
Many of the photos you take in this room will be pointed upward. That’s good because this is the heart and soul of the Capitol tour and, at eye level, the room is full of people. The dome itself is quite impressive. You have your choice here of taking a narrowly focus photo of the mural, The Apotheosis of Washington, or a wide-angle photo that incorporates the whole dome. Given these wide-ranging photo opportunities, I’d recommend having a zoom lens with a broad focal range (e.g., I use an 18-200 mm).
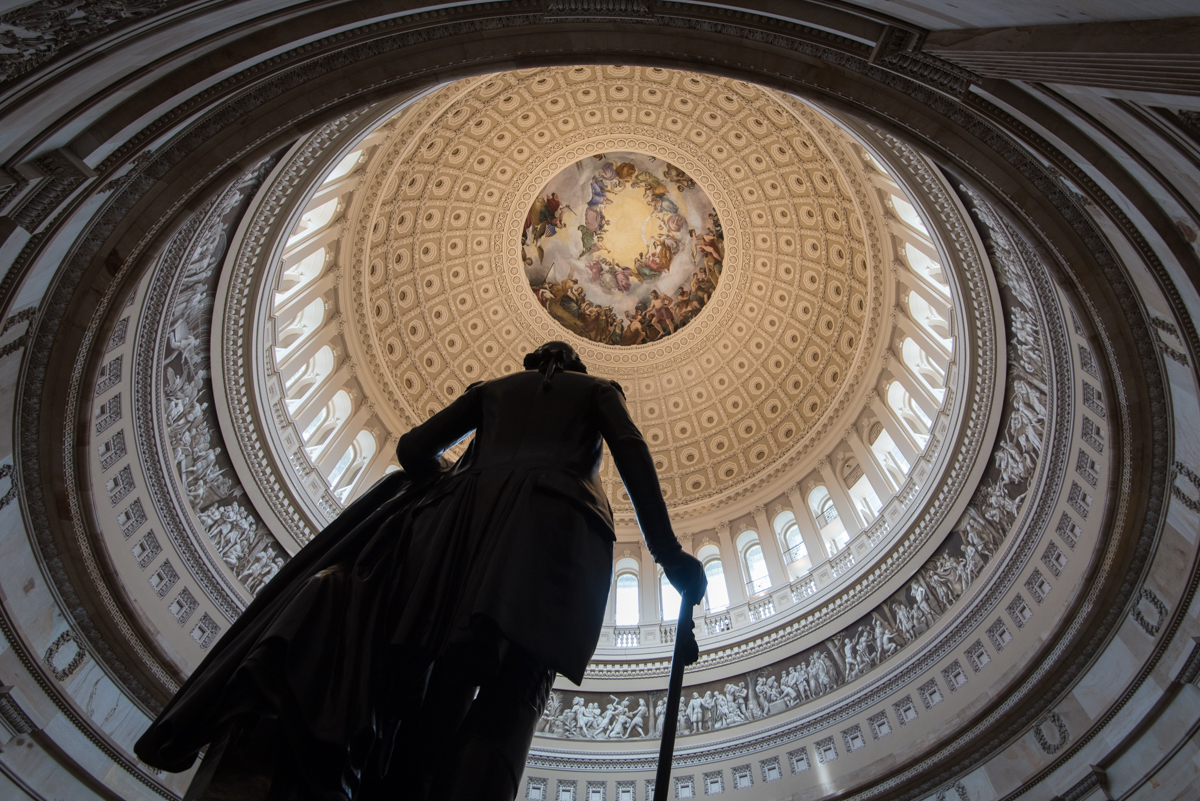
To provide a point of visual interest for the foreground of your photos there are statues that line the periphery of the room. The most iconic (read: the least creative) photo in this room is the one below on the left with the statue of George Washington in the foreground and the dome in the background. You’ll find this photo on promotional materials for the Capitol and you’ll see it in the video at the beginning of the tour. I like retaking iconic photos because (1) I own that photo and can make prints of it if I want and (2) there are a number of other people’s versions for me to compare my own against. For those of you that are interested, here are a couple tips for taking this photo.
- Narrow your aperture as small as you can get it and still get sharp photos using your camera handheld. This way the statue and the mural on the dome will both be in focus.
- Zoom in as much as possible. This may require sitting on the floor (make it quick before someone tells you to get up). By zooming in, the dome appears larger relative to the statue.
None of these photos show the true, awe-inspiring size of the room. That’s why, recently, I went back to the Capitol with my wide-angle lens and took a series of vertoramas (vertical panoramas). I wanted to see if I could capture everything from the floor to the ceiling in one photo and I was very happy with the results. While the photo above (on the right) is actually a combination of 12 photos, it demonstrates what it feels like to stand in that room better than any single photo I could take. For more information on how I make panoramas and vertoramas, view my (free) tutorial.
-Statuary Hall-
The final leg of the tour is through Statuary Hall, which was the old chamber for the House of Representatives. The centerpiece of this room is, once again, the ceiling, however it is much lower than the ceiling in the Rotunda. This makes it difficult to get the whole thing in a single frame. Another part of the fun in this room is finding the statue of a hero from your home state (each state gets two statues placed somewhere in the Capitol and most of them are in this room). The relatively small area and number of people become an issue with eye-level photos.
-Off-Season and Other Tours-
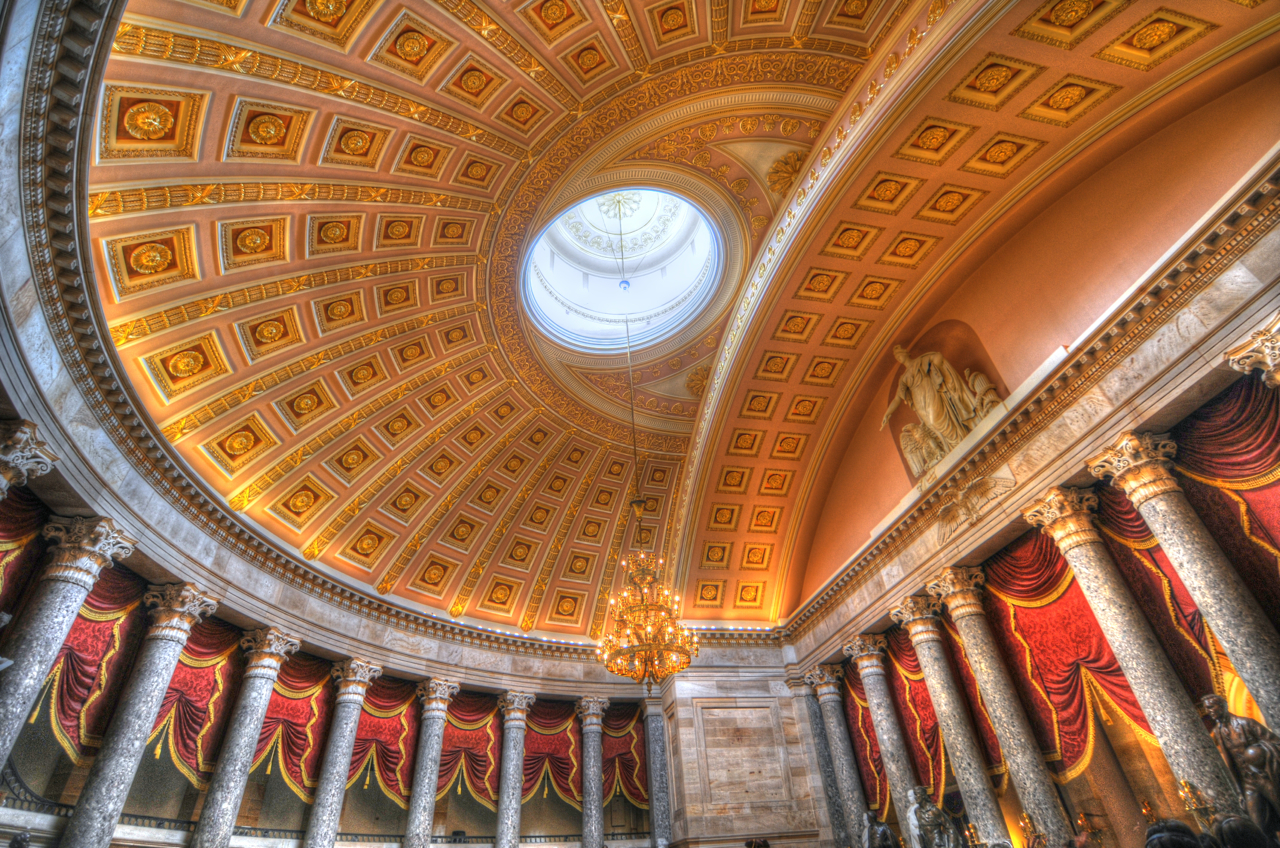
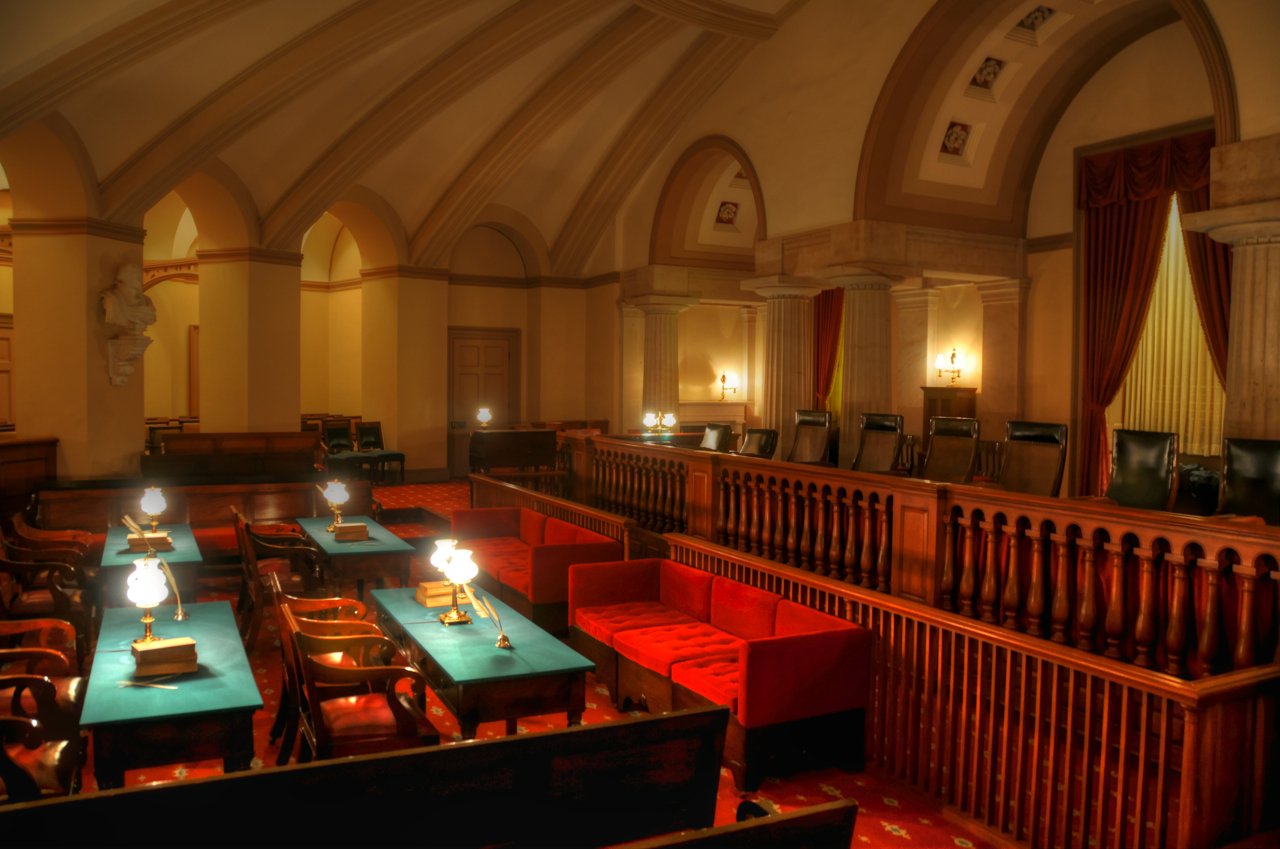
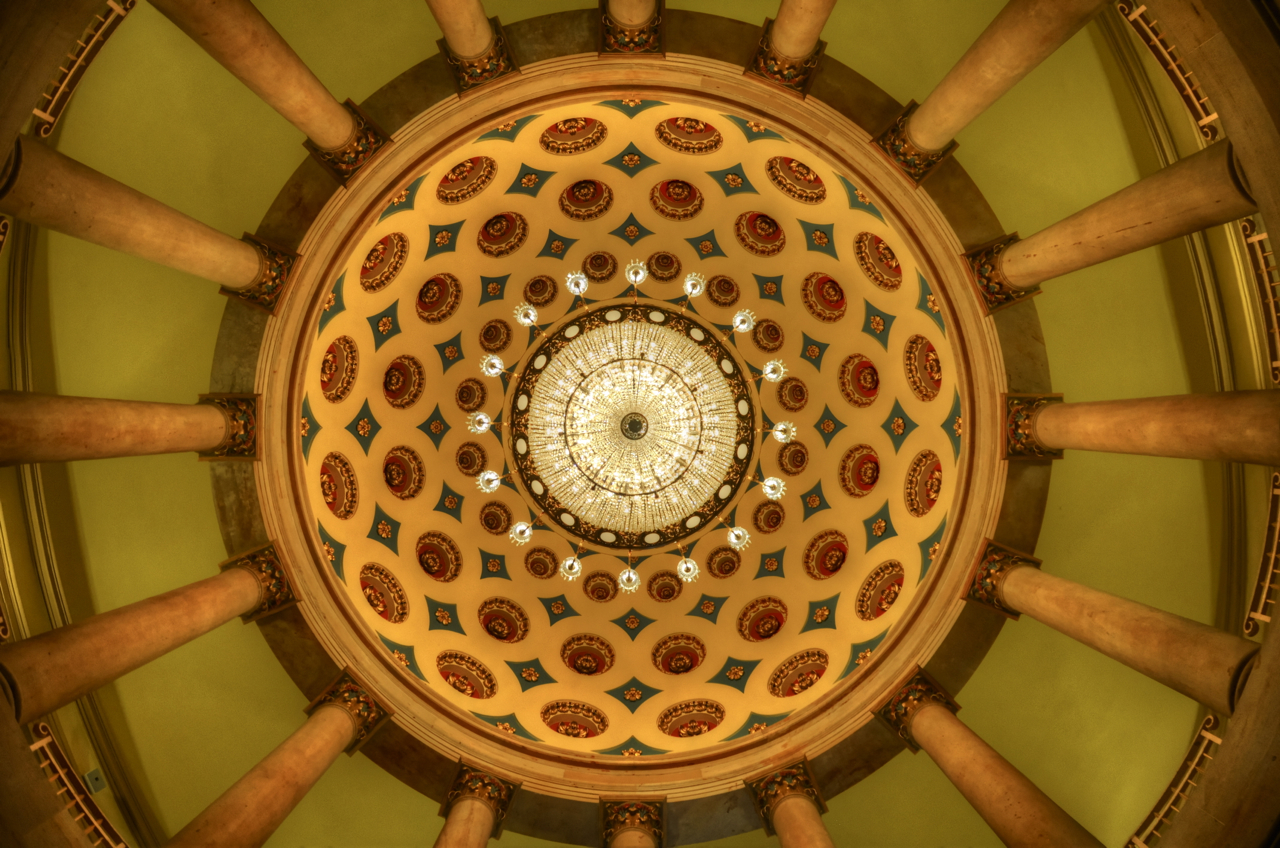
Last year, I toured the Capitol shortly before New Year’s, when the crowds were sparse. I had just learned about HDR and wanted to try it out at the Capitol. To my surprise, I got to see a bit more than I had the time I’d went before. My tour group took a little side trip while on the same level as the Crypt to see the old Supreme Court chambers (below left) and the small but impressive Senate Rotunda (below right).
One other thing that I’ve wanted to do, but have not yet done, is take a tour of the Capitol Dome. In these tours, you get to walk around the interior of the Dome (180 feet above the Rotunda floor) and stand directly beneath the Apotheosis of Washington mural. You also get to stand on the outside of the Dome, beneath the statue of Freedom that sits on top of the Capitol, and look out over Washington. These tours are a little trickier to get than the regular Capitol tour. These have to be arranged through your Congressperson’s office and, from my understanding, your Senator or Representative has to accompany you for the tour. It’s worth asking though. From the photos I’ve seen, this is an amazing opportunity.
What to Bring
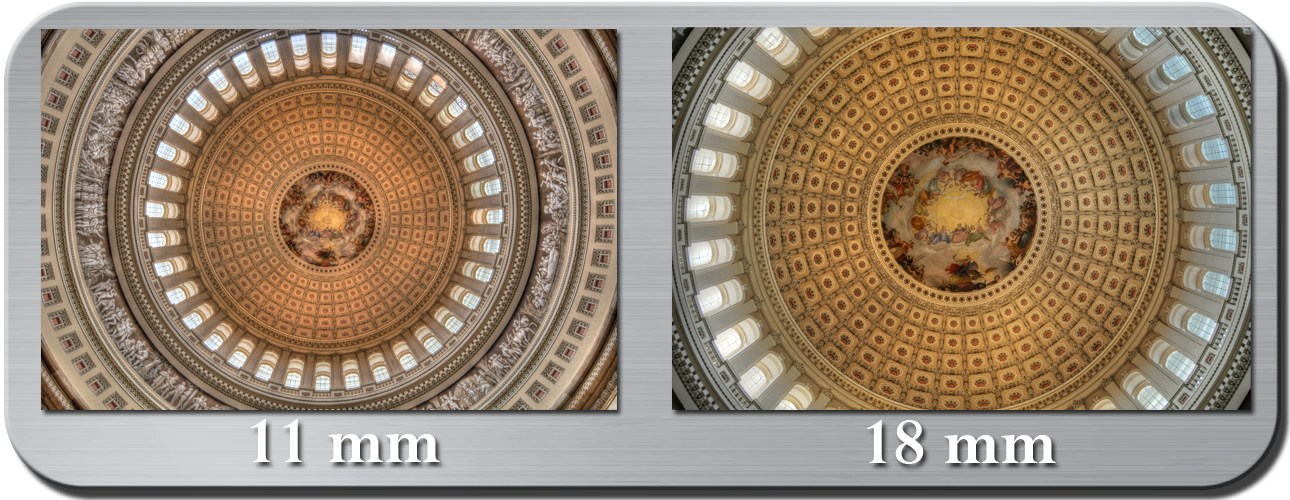
Lens: I recommend using a lens with a broad zoom range (DX format: 18-135 mm, FX: 27-200 mm) or a wide-angle lens (< 18 mm, <27 mm). I talked earlier about the pros and cons of these types of lenses. If you have them, you might be tempted to bring both and swap out as necessary. Unless you are very skilled at swapping your lenses at the fly, I wouldn’t recommend it. The tour moves fast enough and there are enough people to make this process cumbersome. Below is a comparison of 11 and 18mm focal lengths, taken with a DX format camera. If all else fails, you can always get walk-in tickets and go back through.
Tripod: Don’t bring it. You won’t be able to use it so you can leave it at home or at your hotel room. They will let you bring a tripod on the tour as long as you carry it in such a way that it won’t bump into anything. So if you are planning on going somewhere before or afterward where you’ll want a tripod you can bring it along.
Flash: Don’t bring it. I’m not a big fan of using the flash. There are some areas where it could be useful (the Crypt, for example) but there is enough light in the Rotunda and Statuary Hall that you can take photos handheld without a problem.
Filters: There is no need for filters, at least not how I ordinarily use them. The lighting situation is pretty straightforward.
Bag: A small or medium size bag should do the trick. Large bags aren’t allowed into the Capitol, but bags large enough to hold your camera, some lenses, and a few accessories are allowed. So bring what you think you’ll need not only for the Capitol but for some of the nearby sites (e.g., the Library of Congress).
Additional Resources
- Capitol Visitor Center – I gave you a lot of information here, but you can get it straight from the horse’s mouth by going to the Visitor Center’s website.
- Wikipedia – Someone (or some people) put a lot of work into this post about the history of the Capitol. I can’t/don’t vouch for all of its contents but it’s an entertaining read.
Summary
What: The Interior of the U.S. Capitol
Where: Entrance is on the East Side of the U.S. Capitol
When: 8:30 a.m. – 4:30 p.m. (last tour starts at 3:20 p.m.) Monday – Saturday
____________________________
Lens: Telephoto (DX: 18-135mm; FX: 27-200mm) or Wide-Angle (< 18mm; < 27mm)
Tripod: Don’t Bring It
Flash: Don’t Bring It
Filter: Don’t Bring Them
Bag: Small or Medium




2 thoughts on “Photographing the Interior of the U.S. Capitol”